
Shawl Every Day 2021 - Day 57 - How to make a slip knot
There are many ways to make a slip knot, but here is the way I learned.
Shawl pattern is Shaelyn by Leila Raven
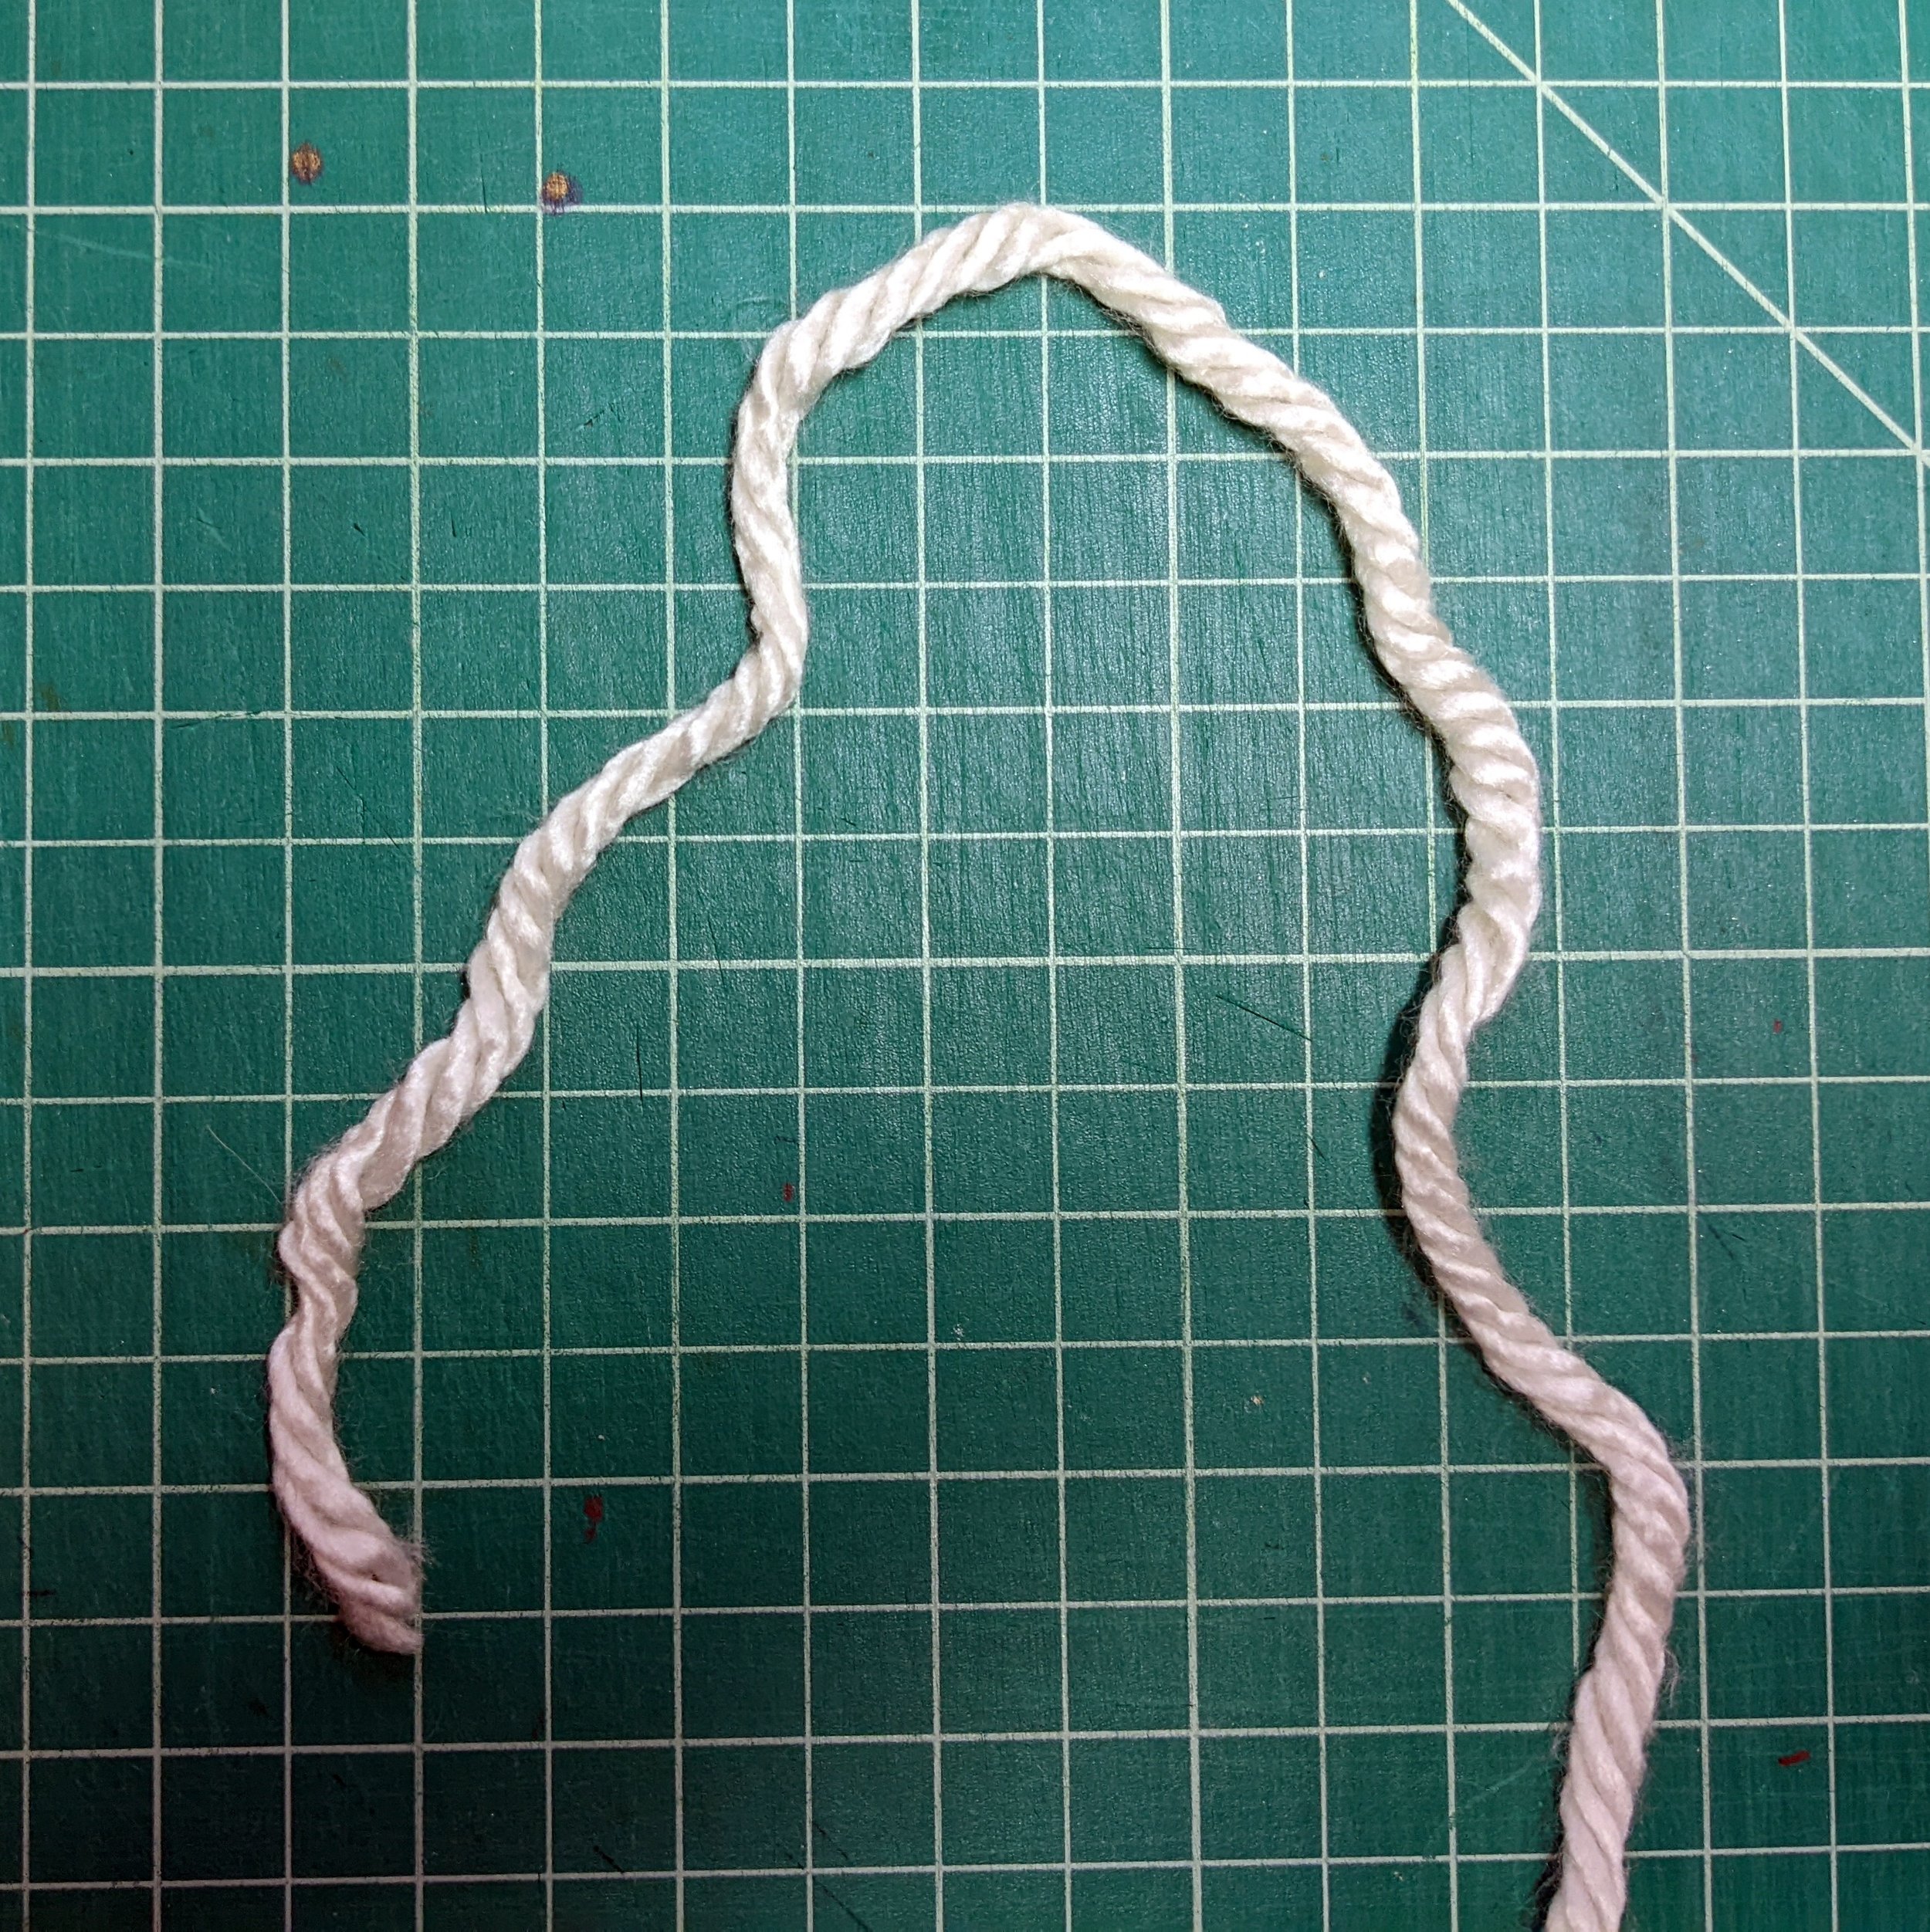
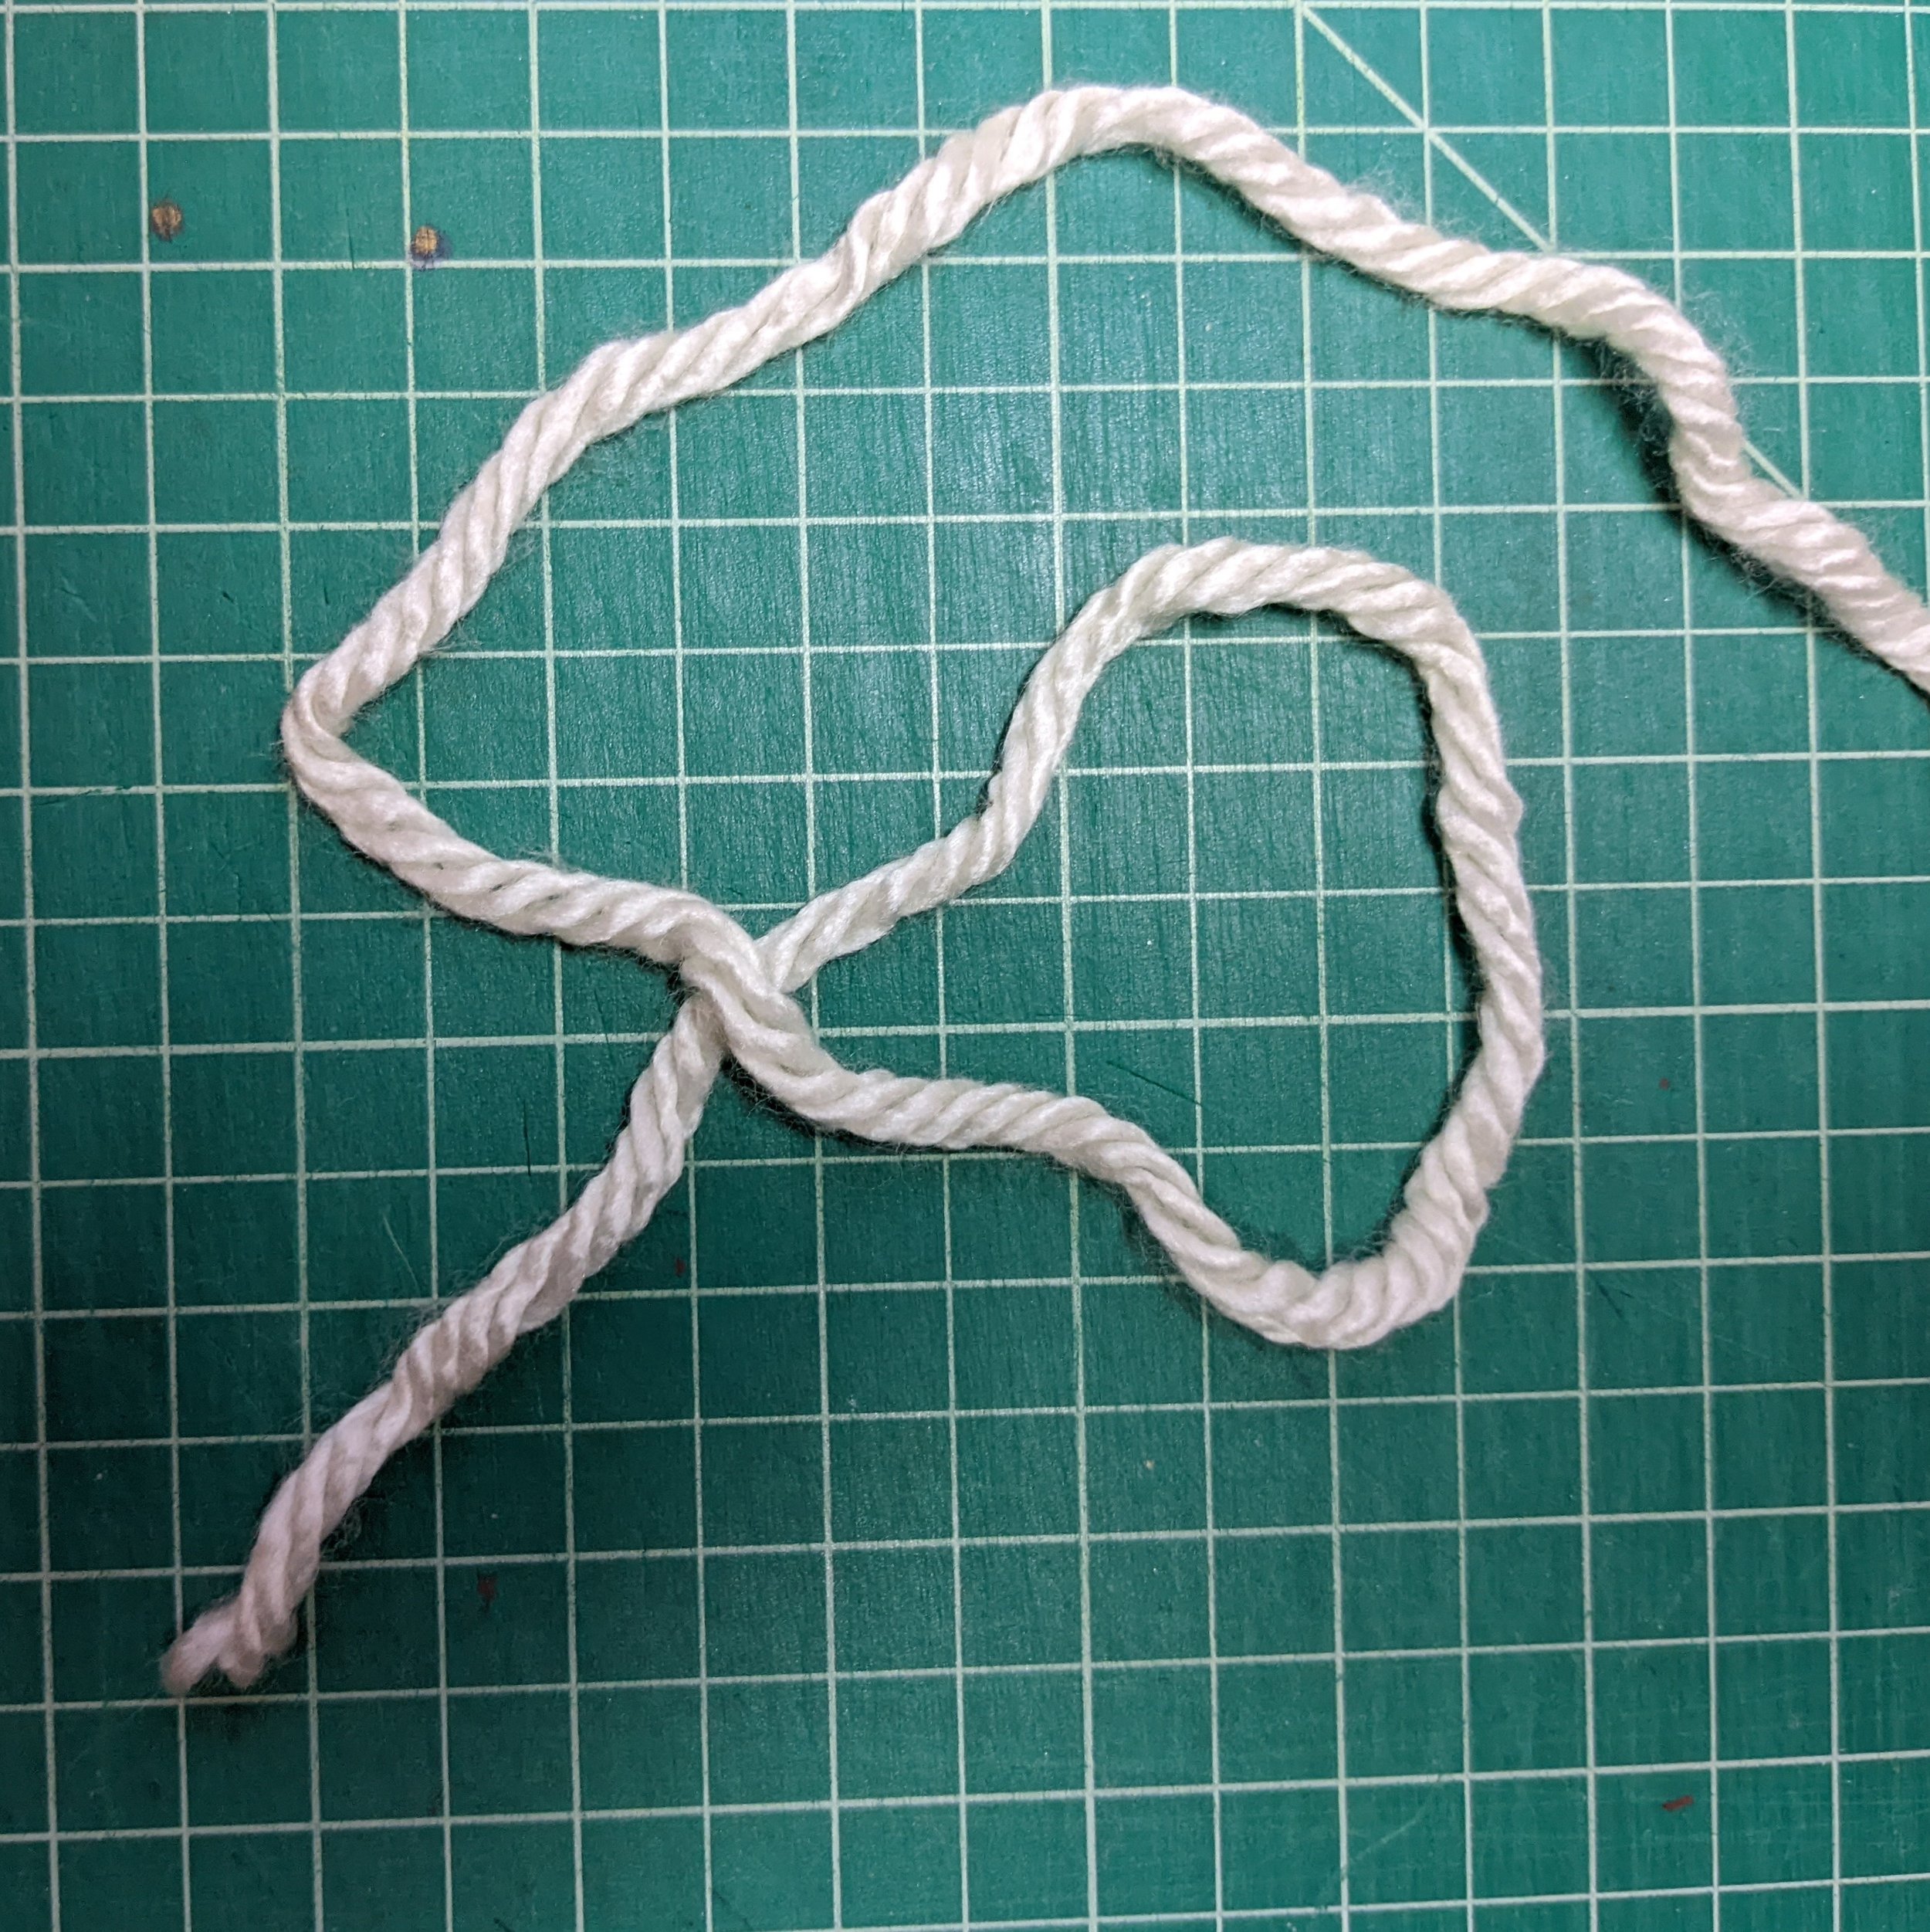
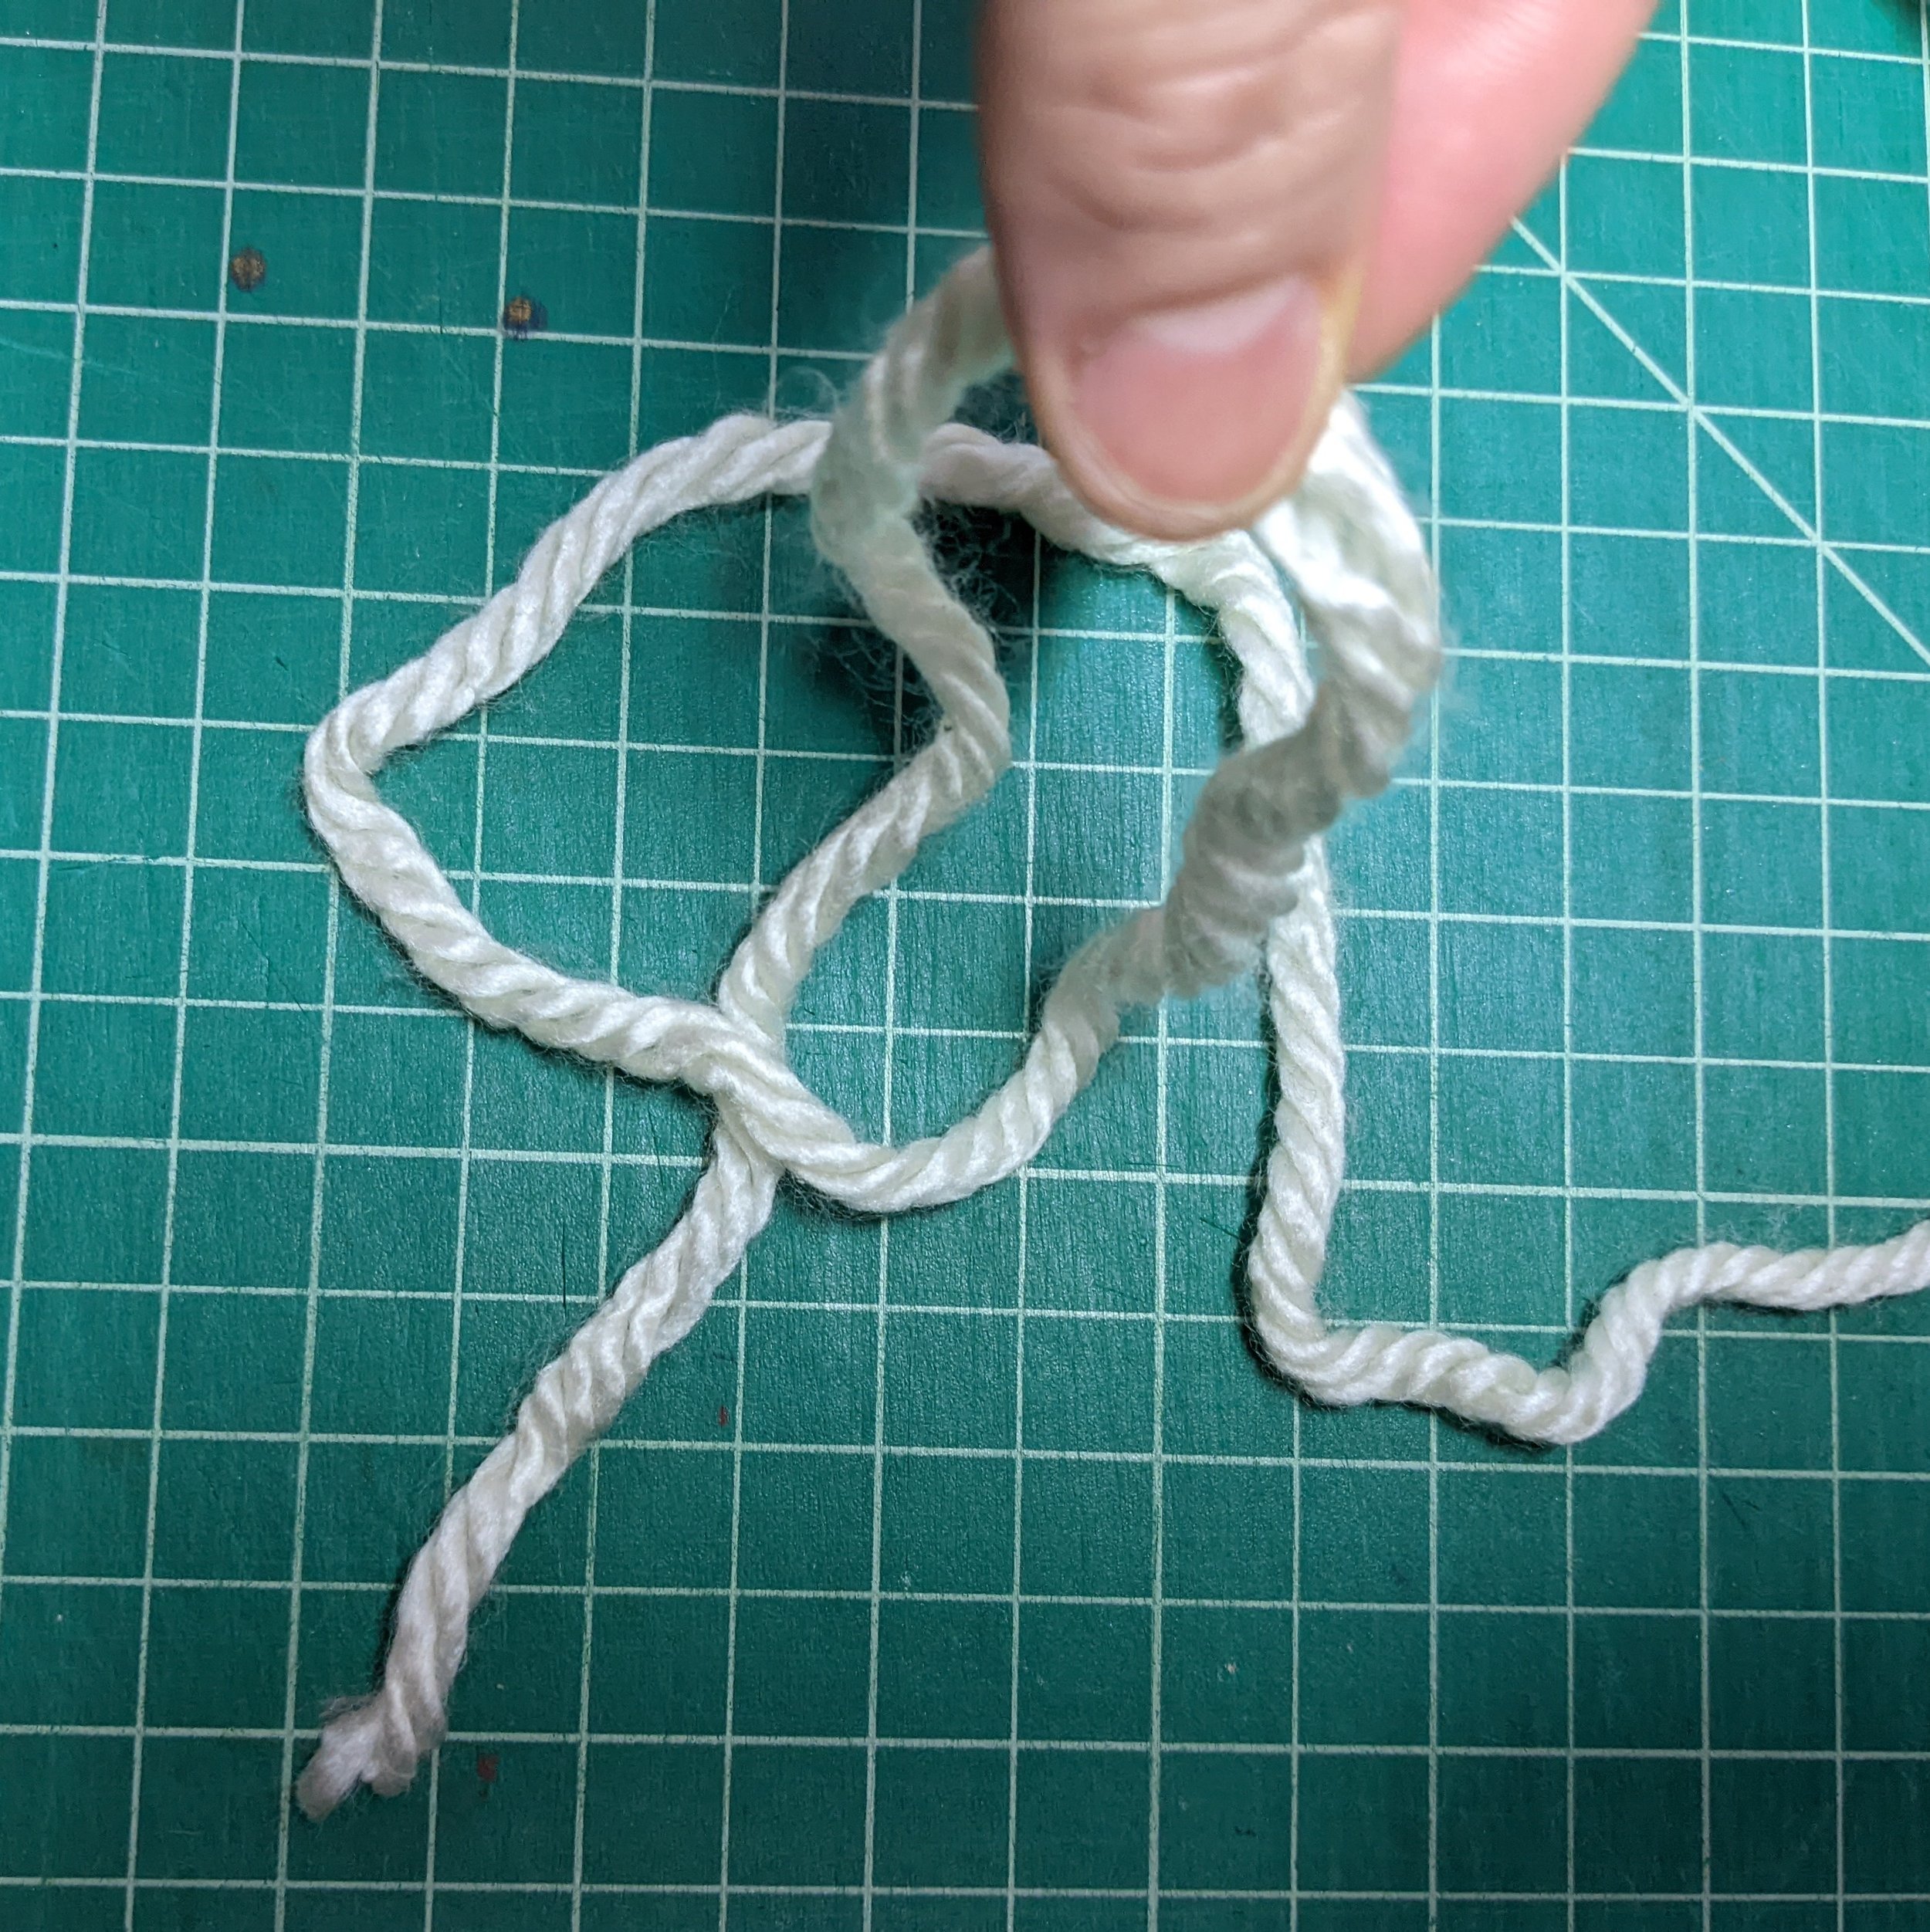
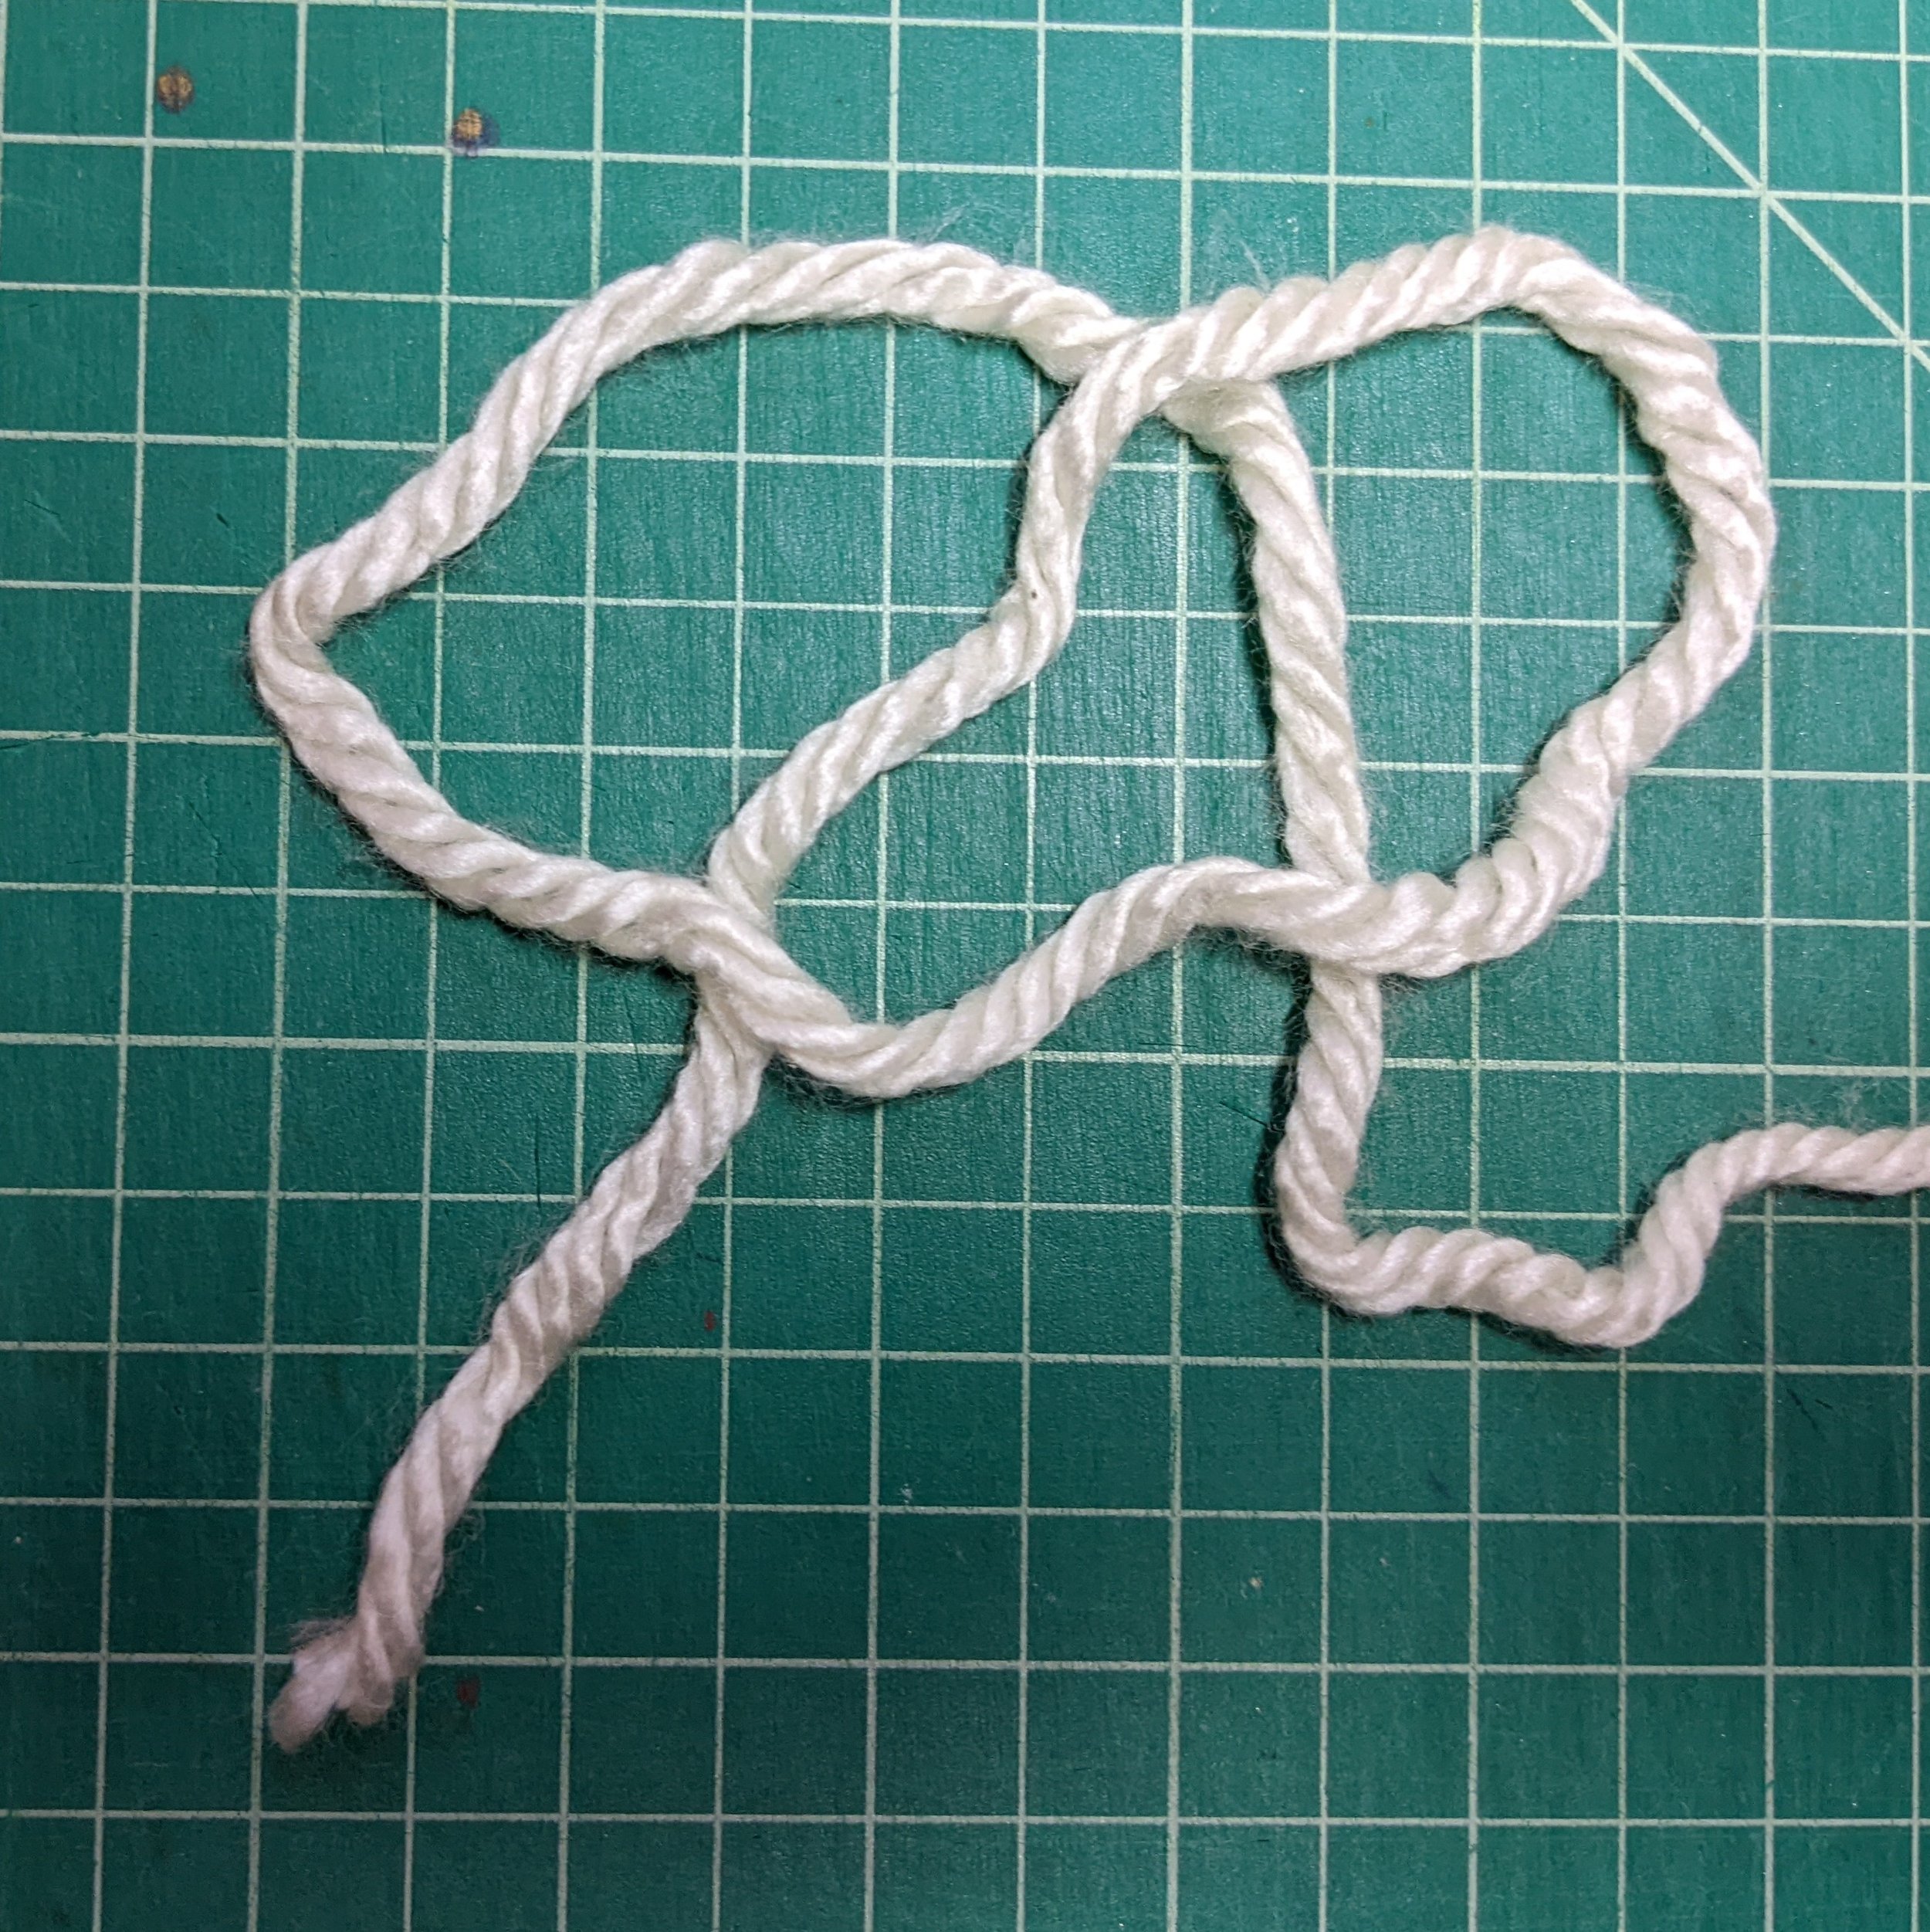
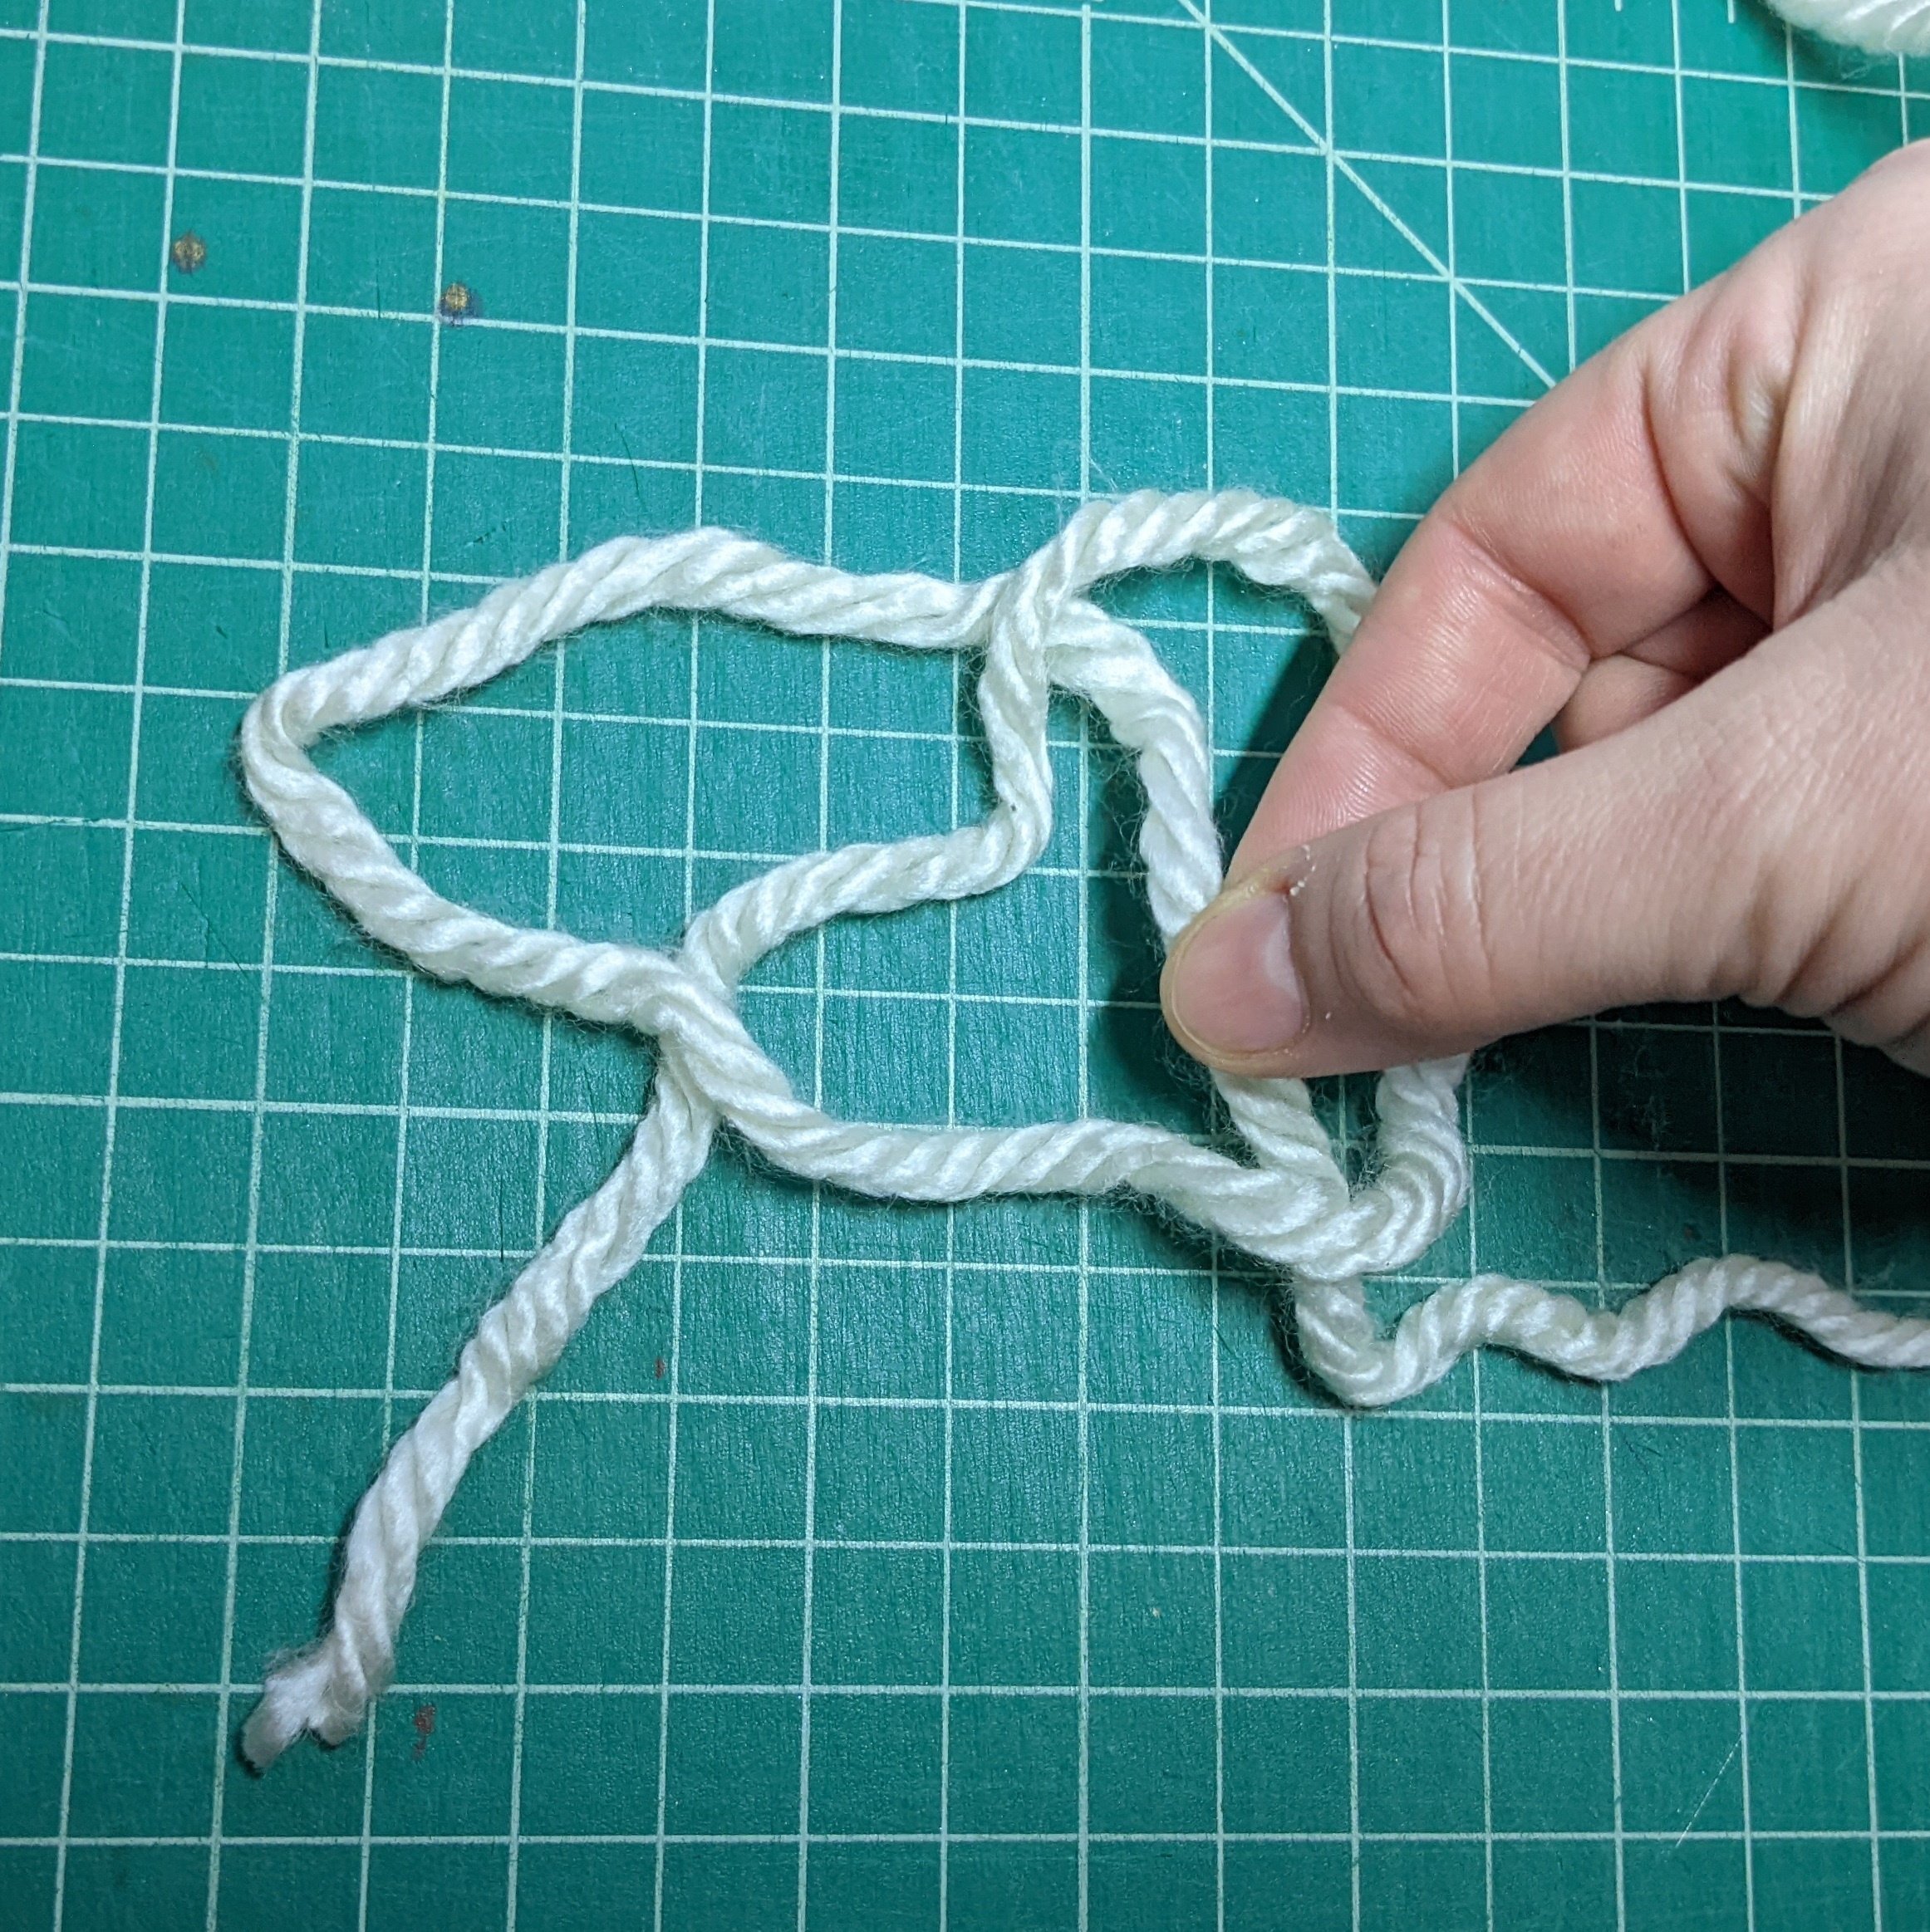
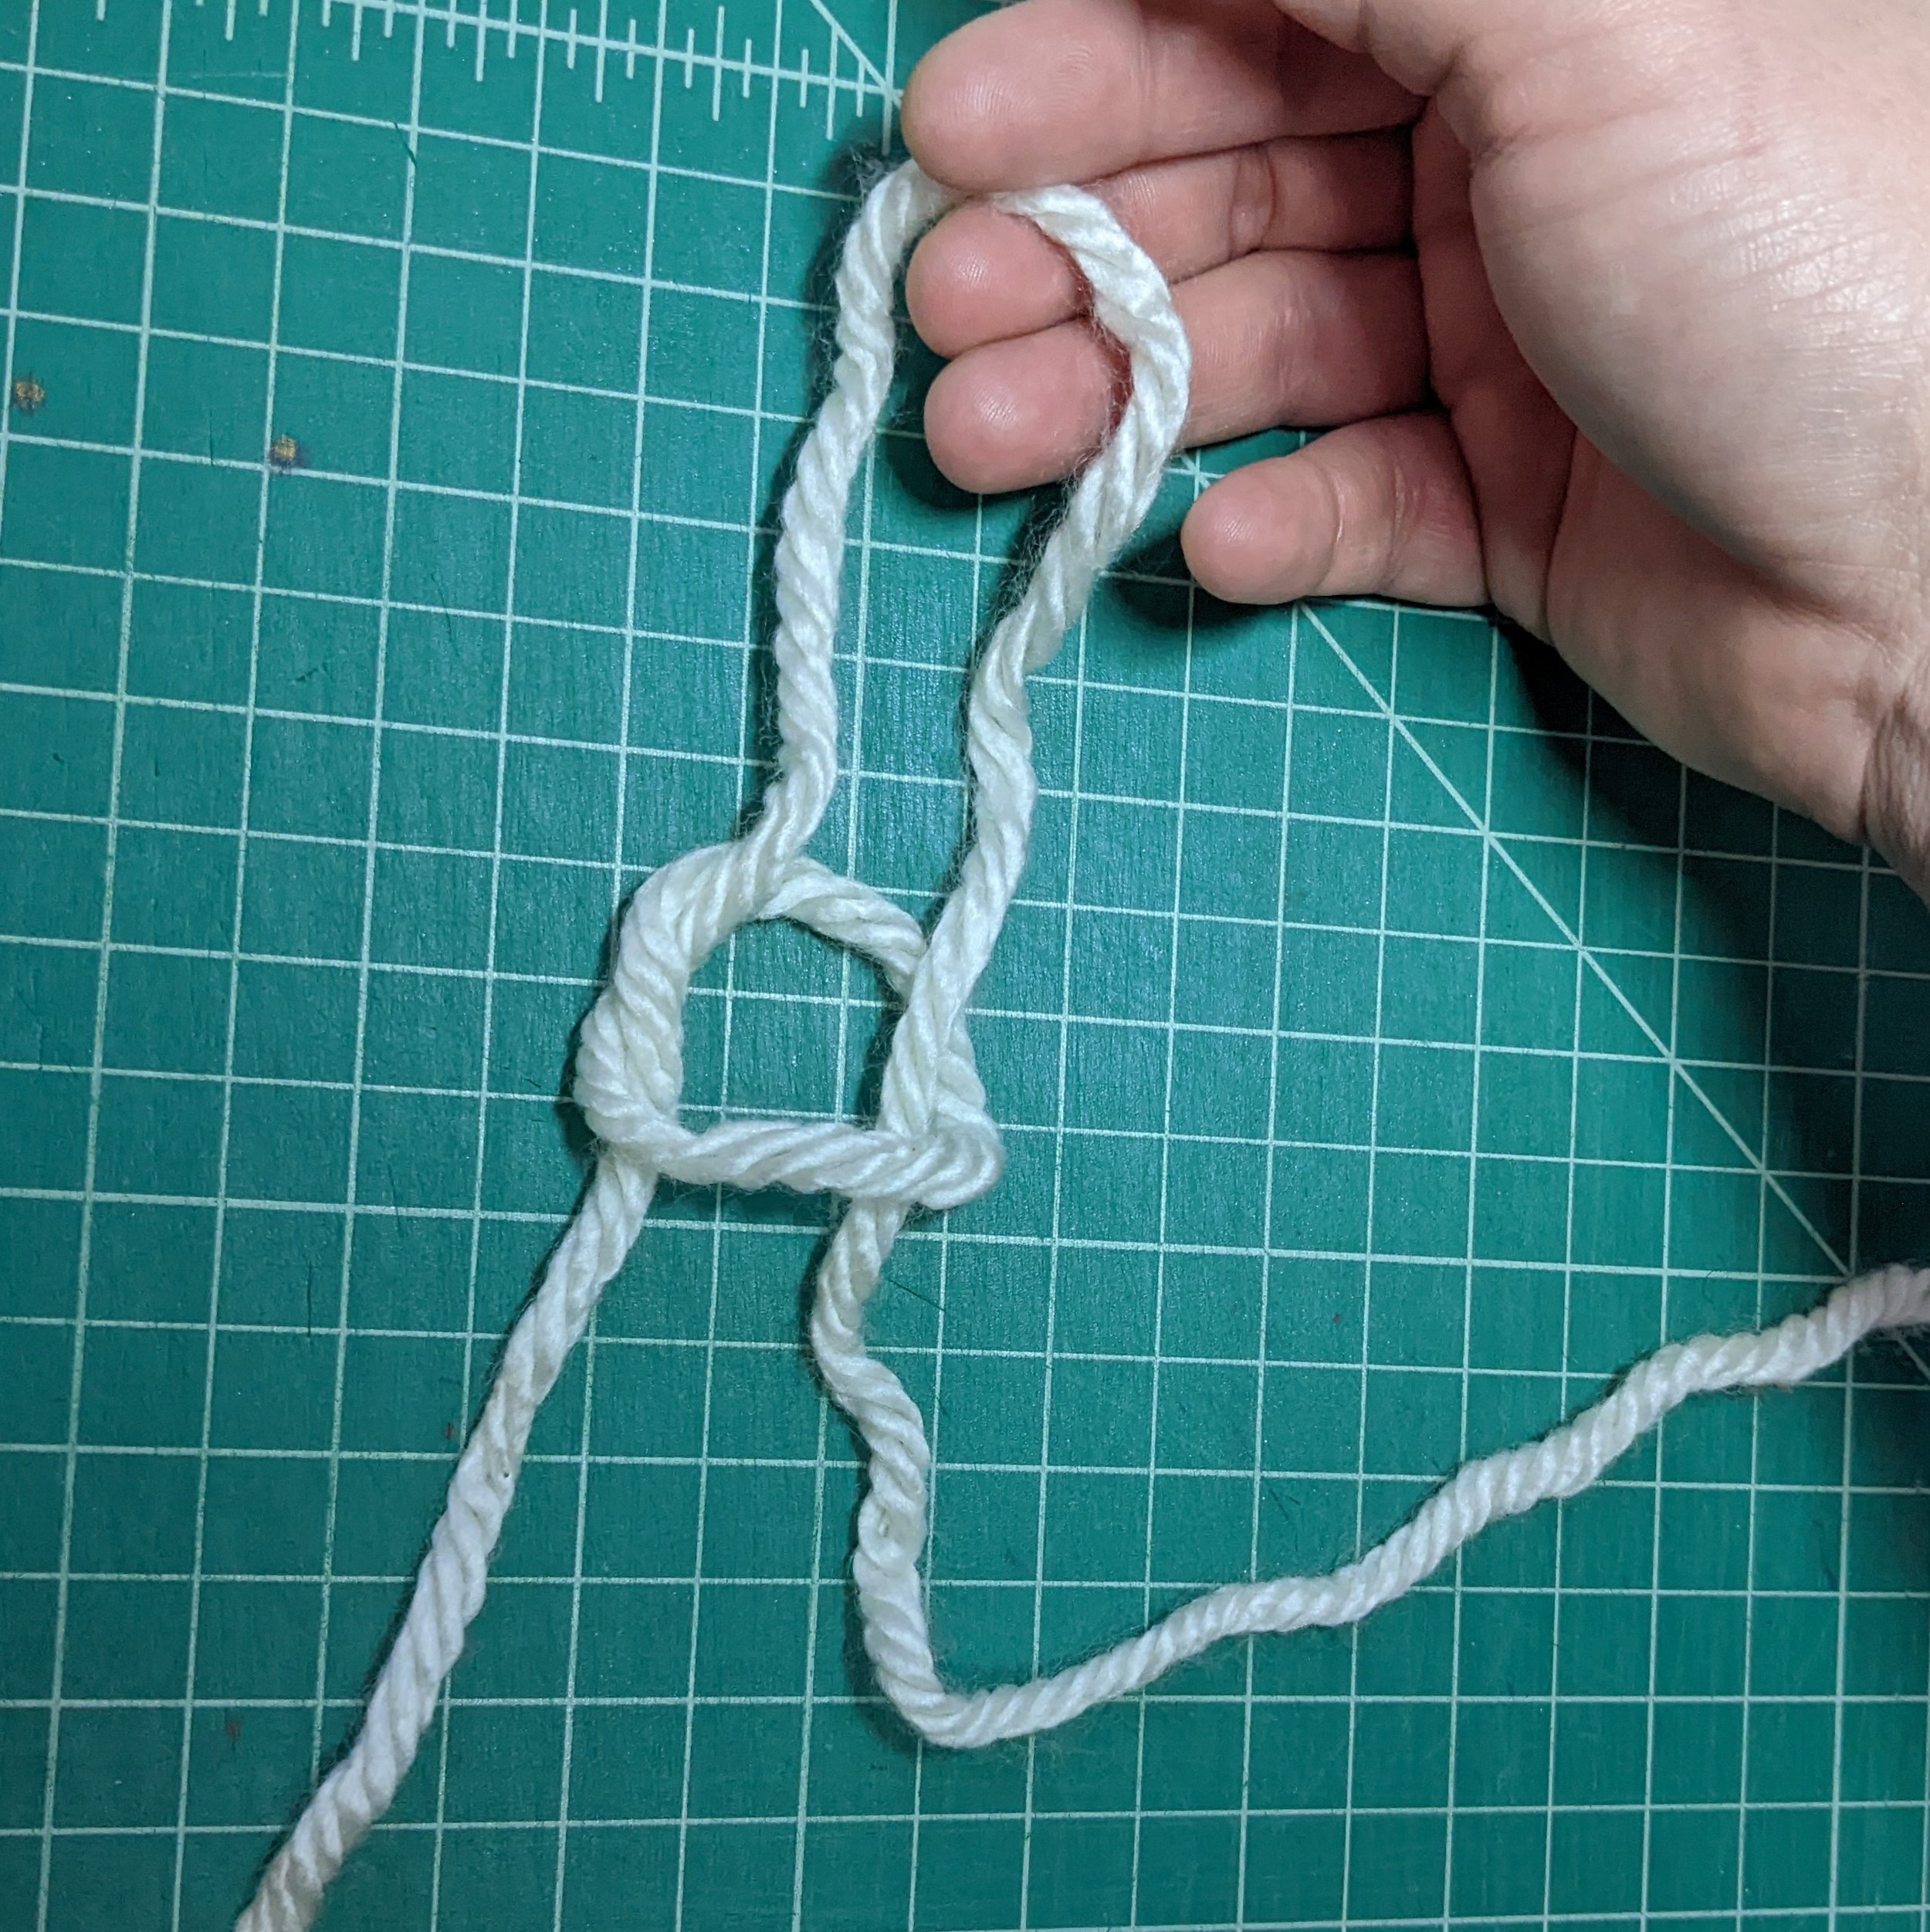

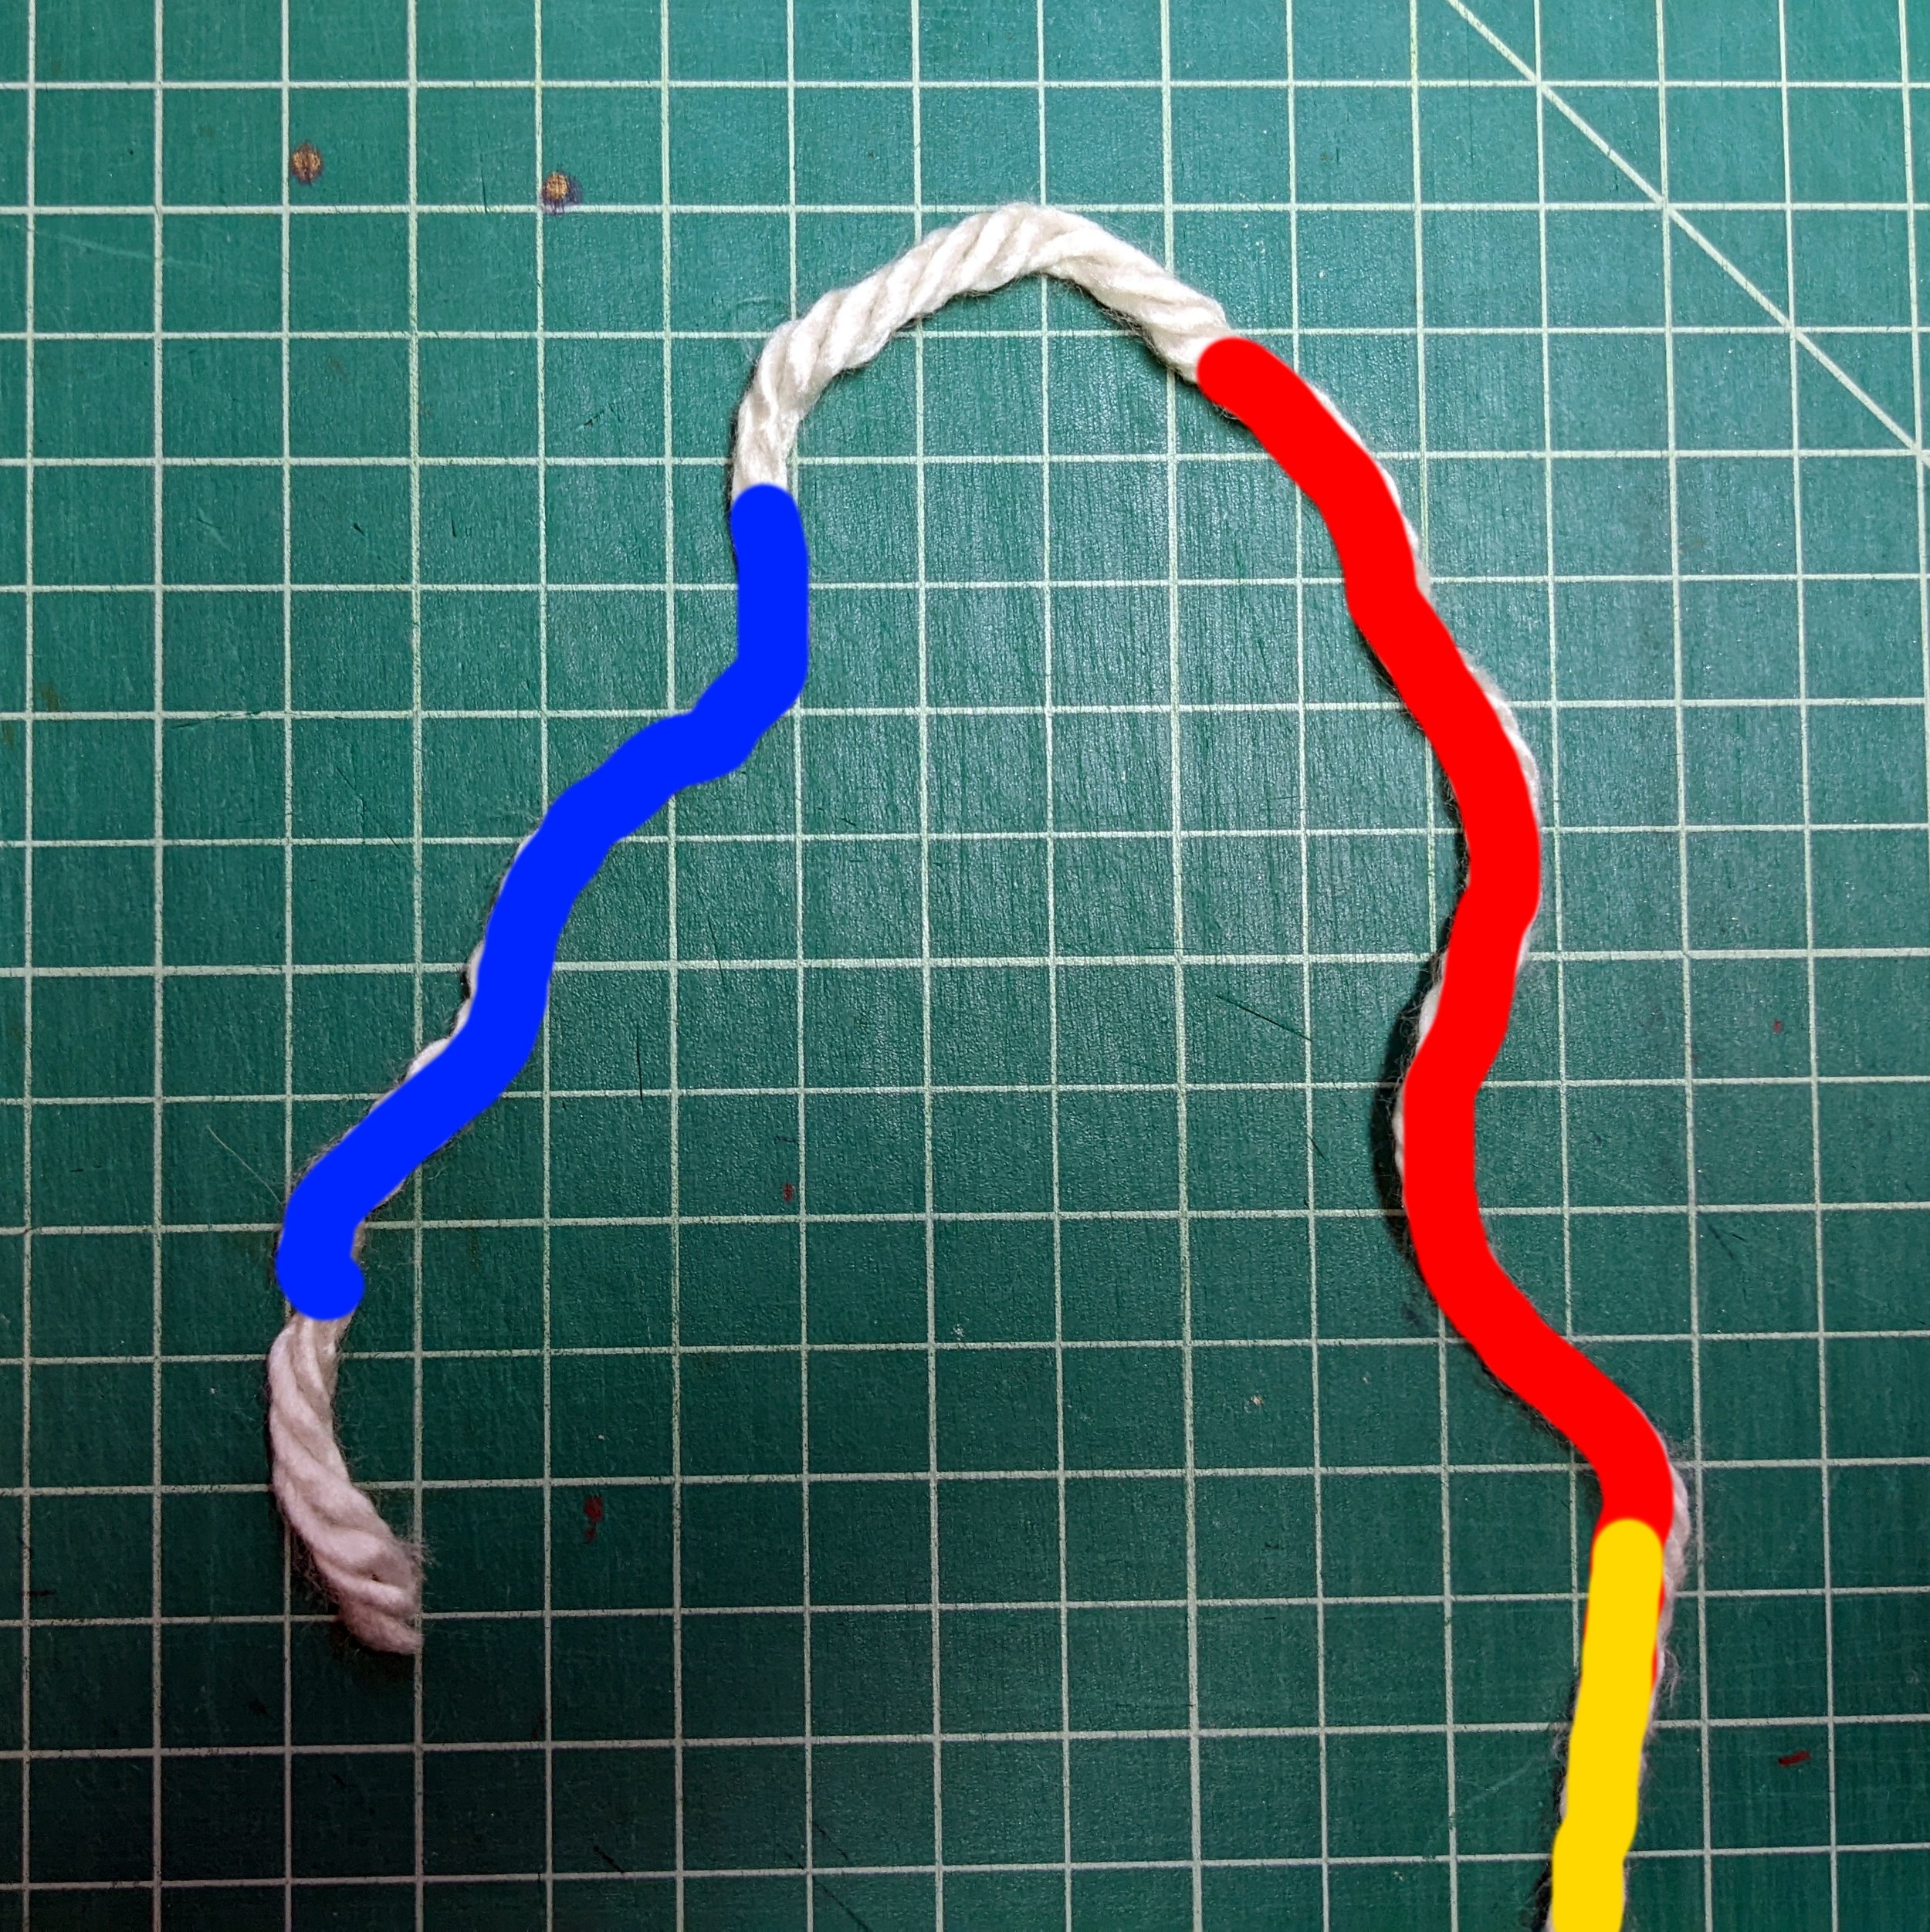
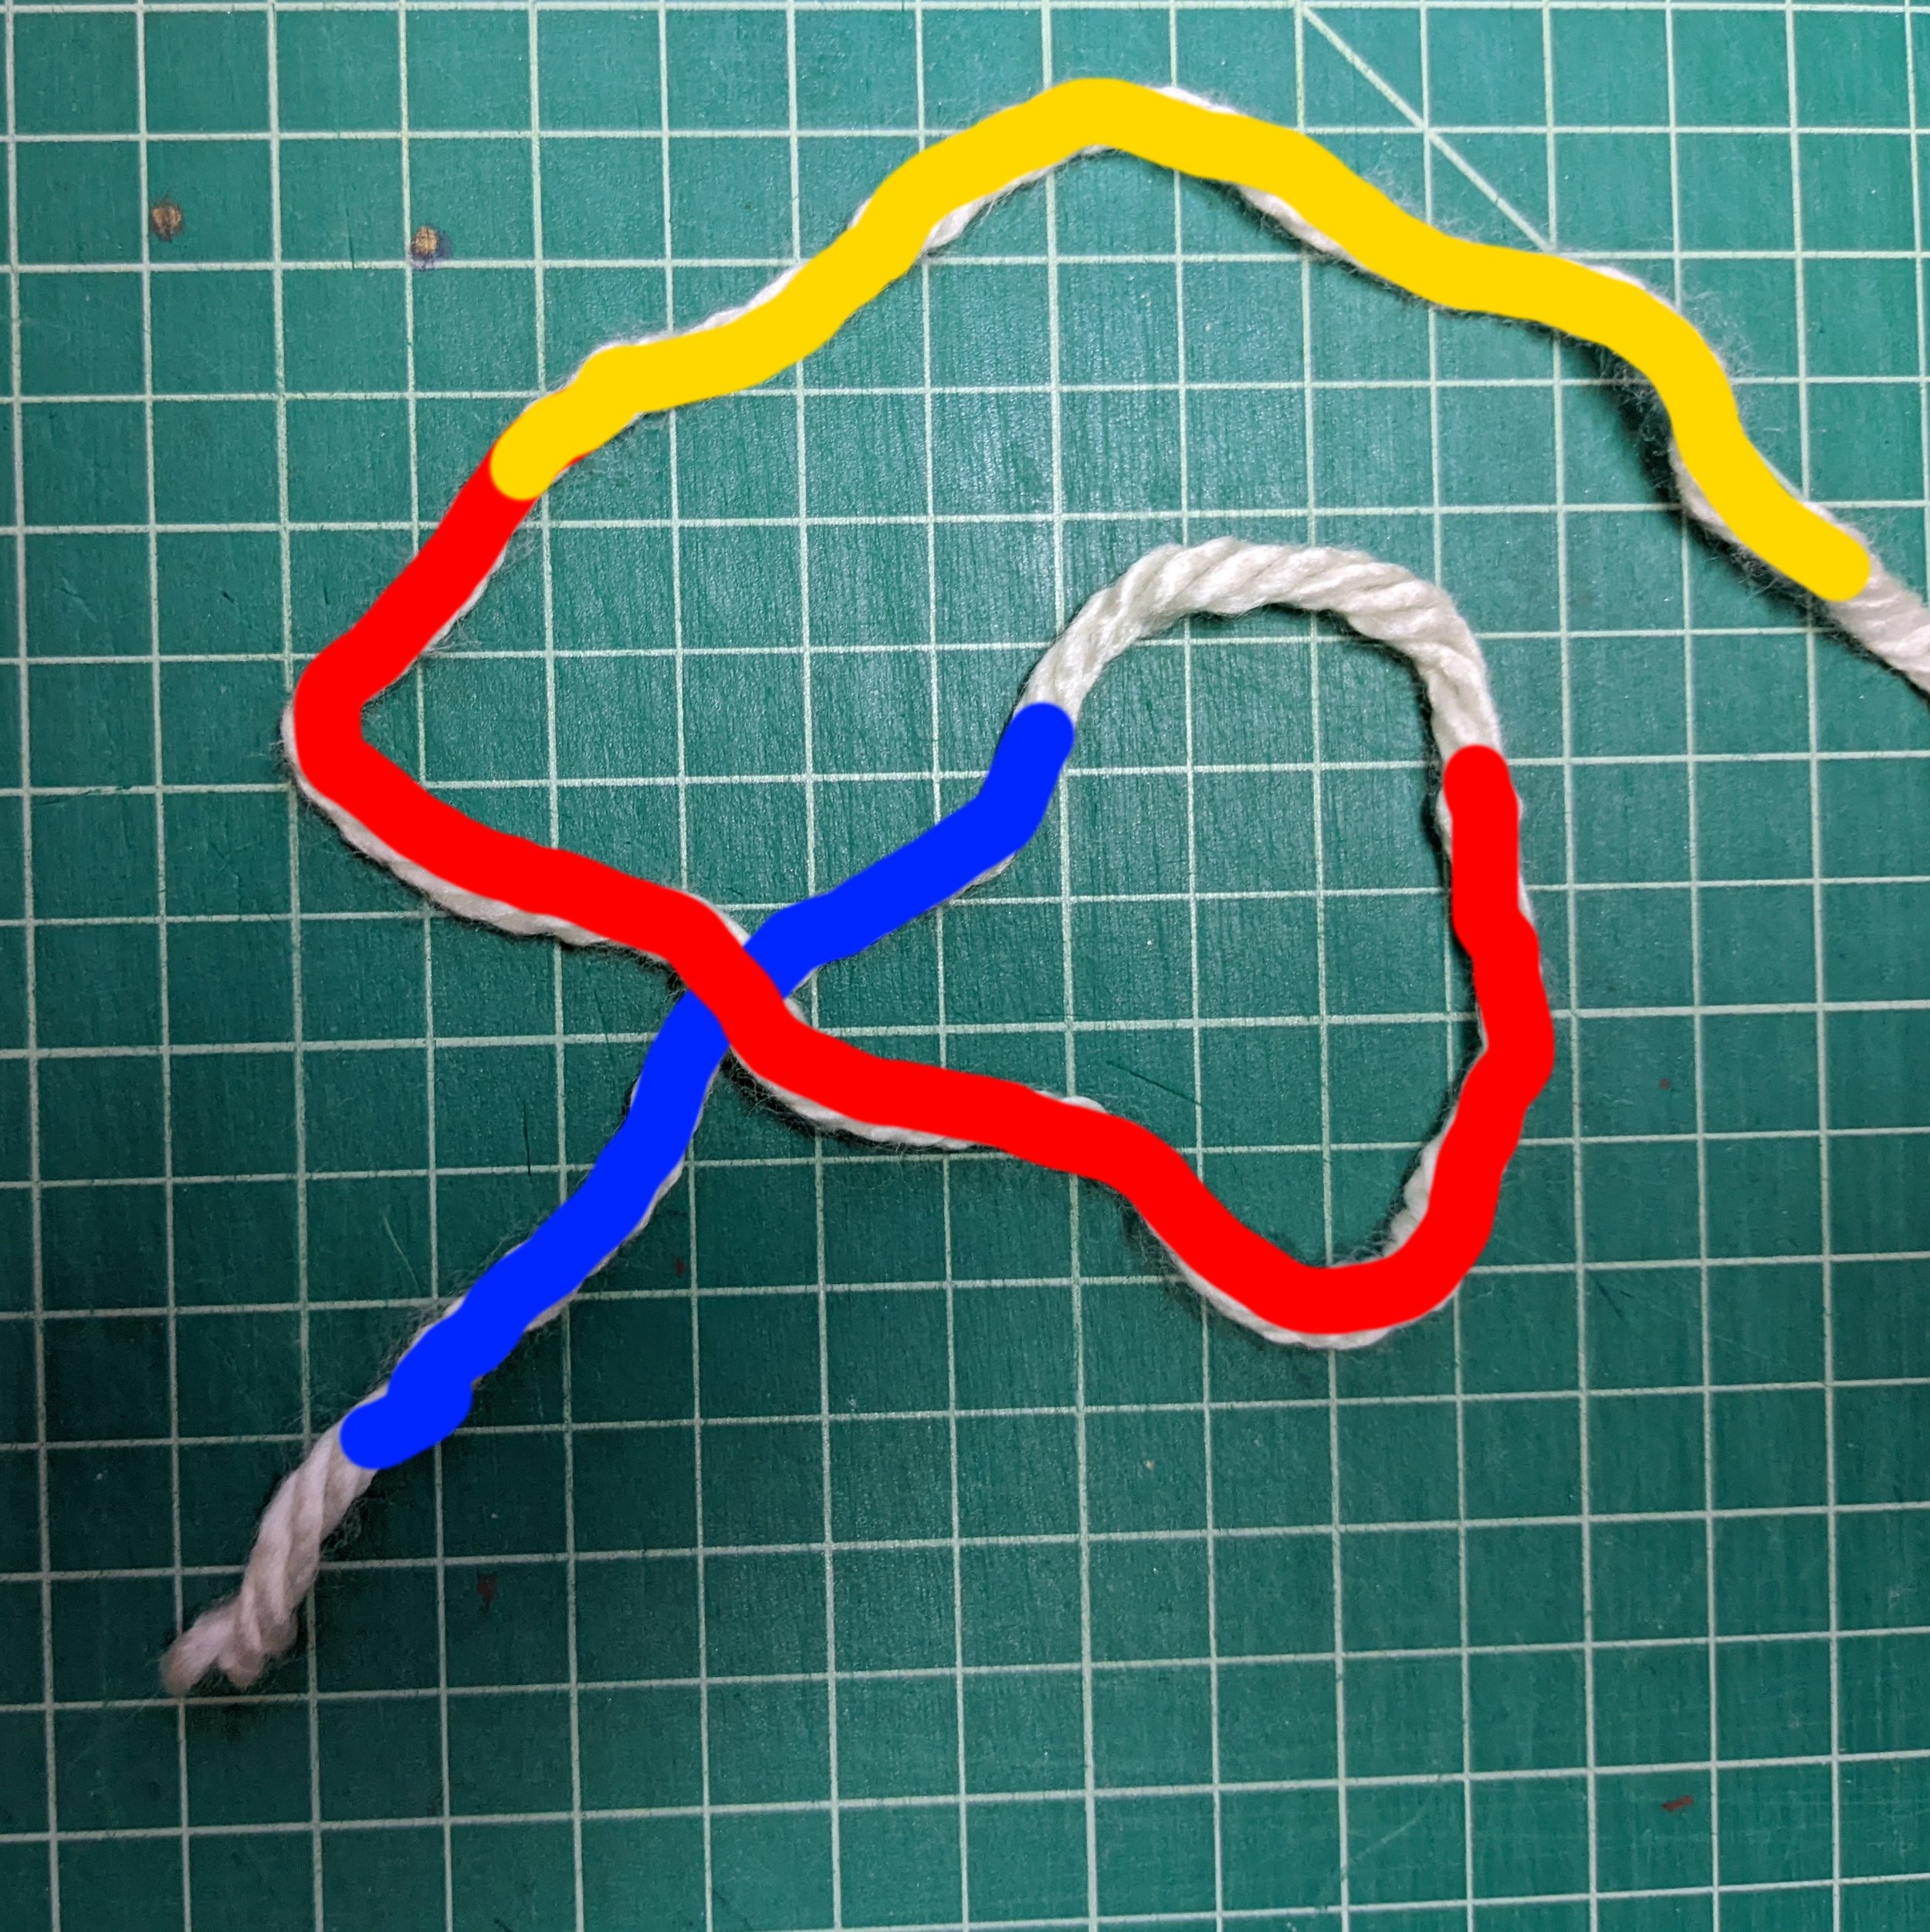
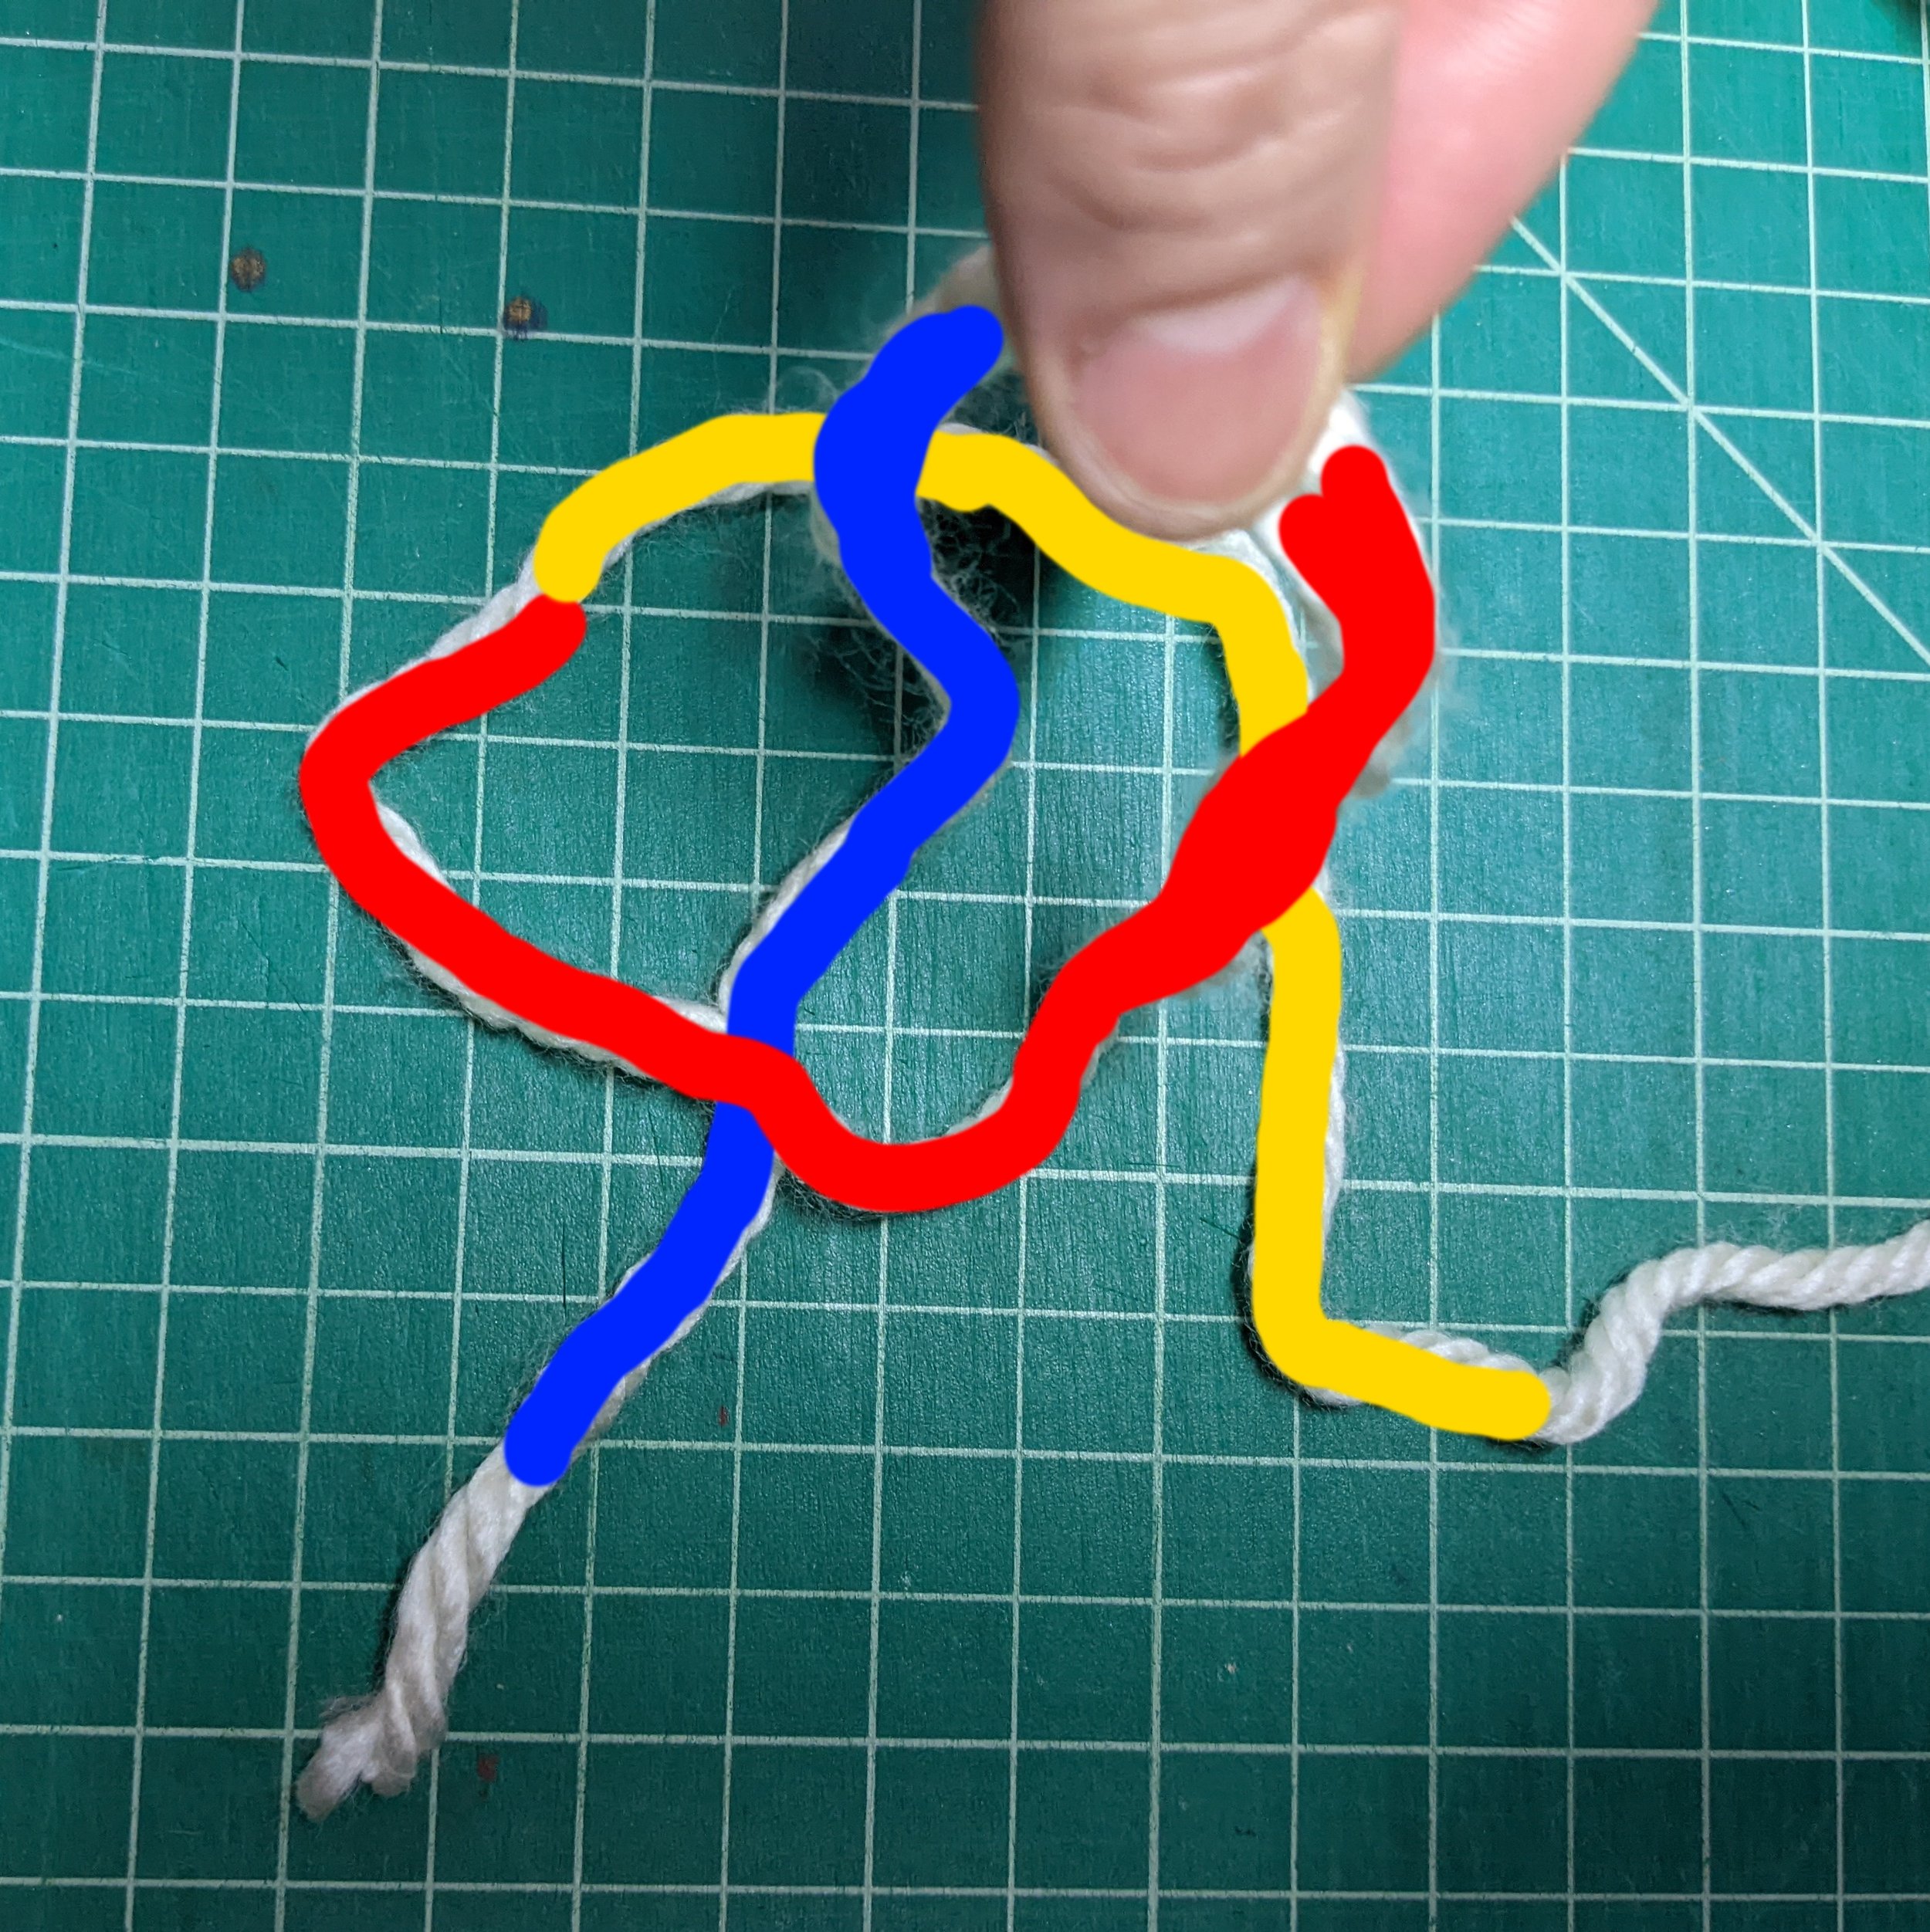
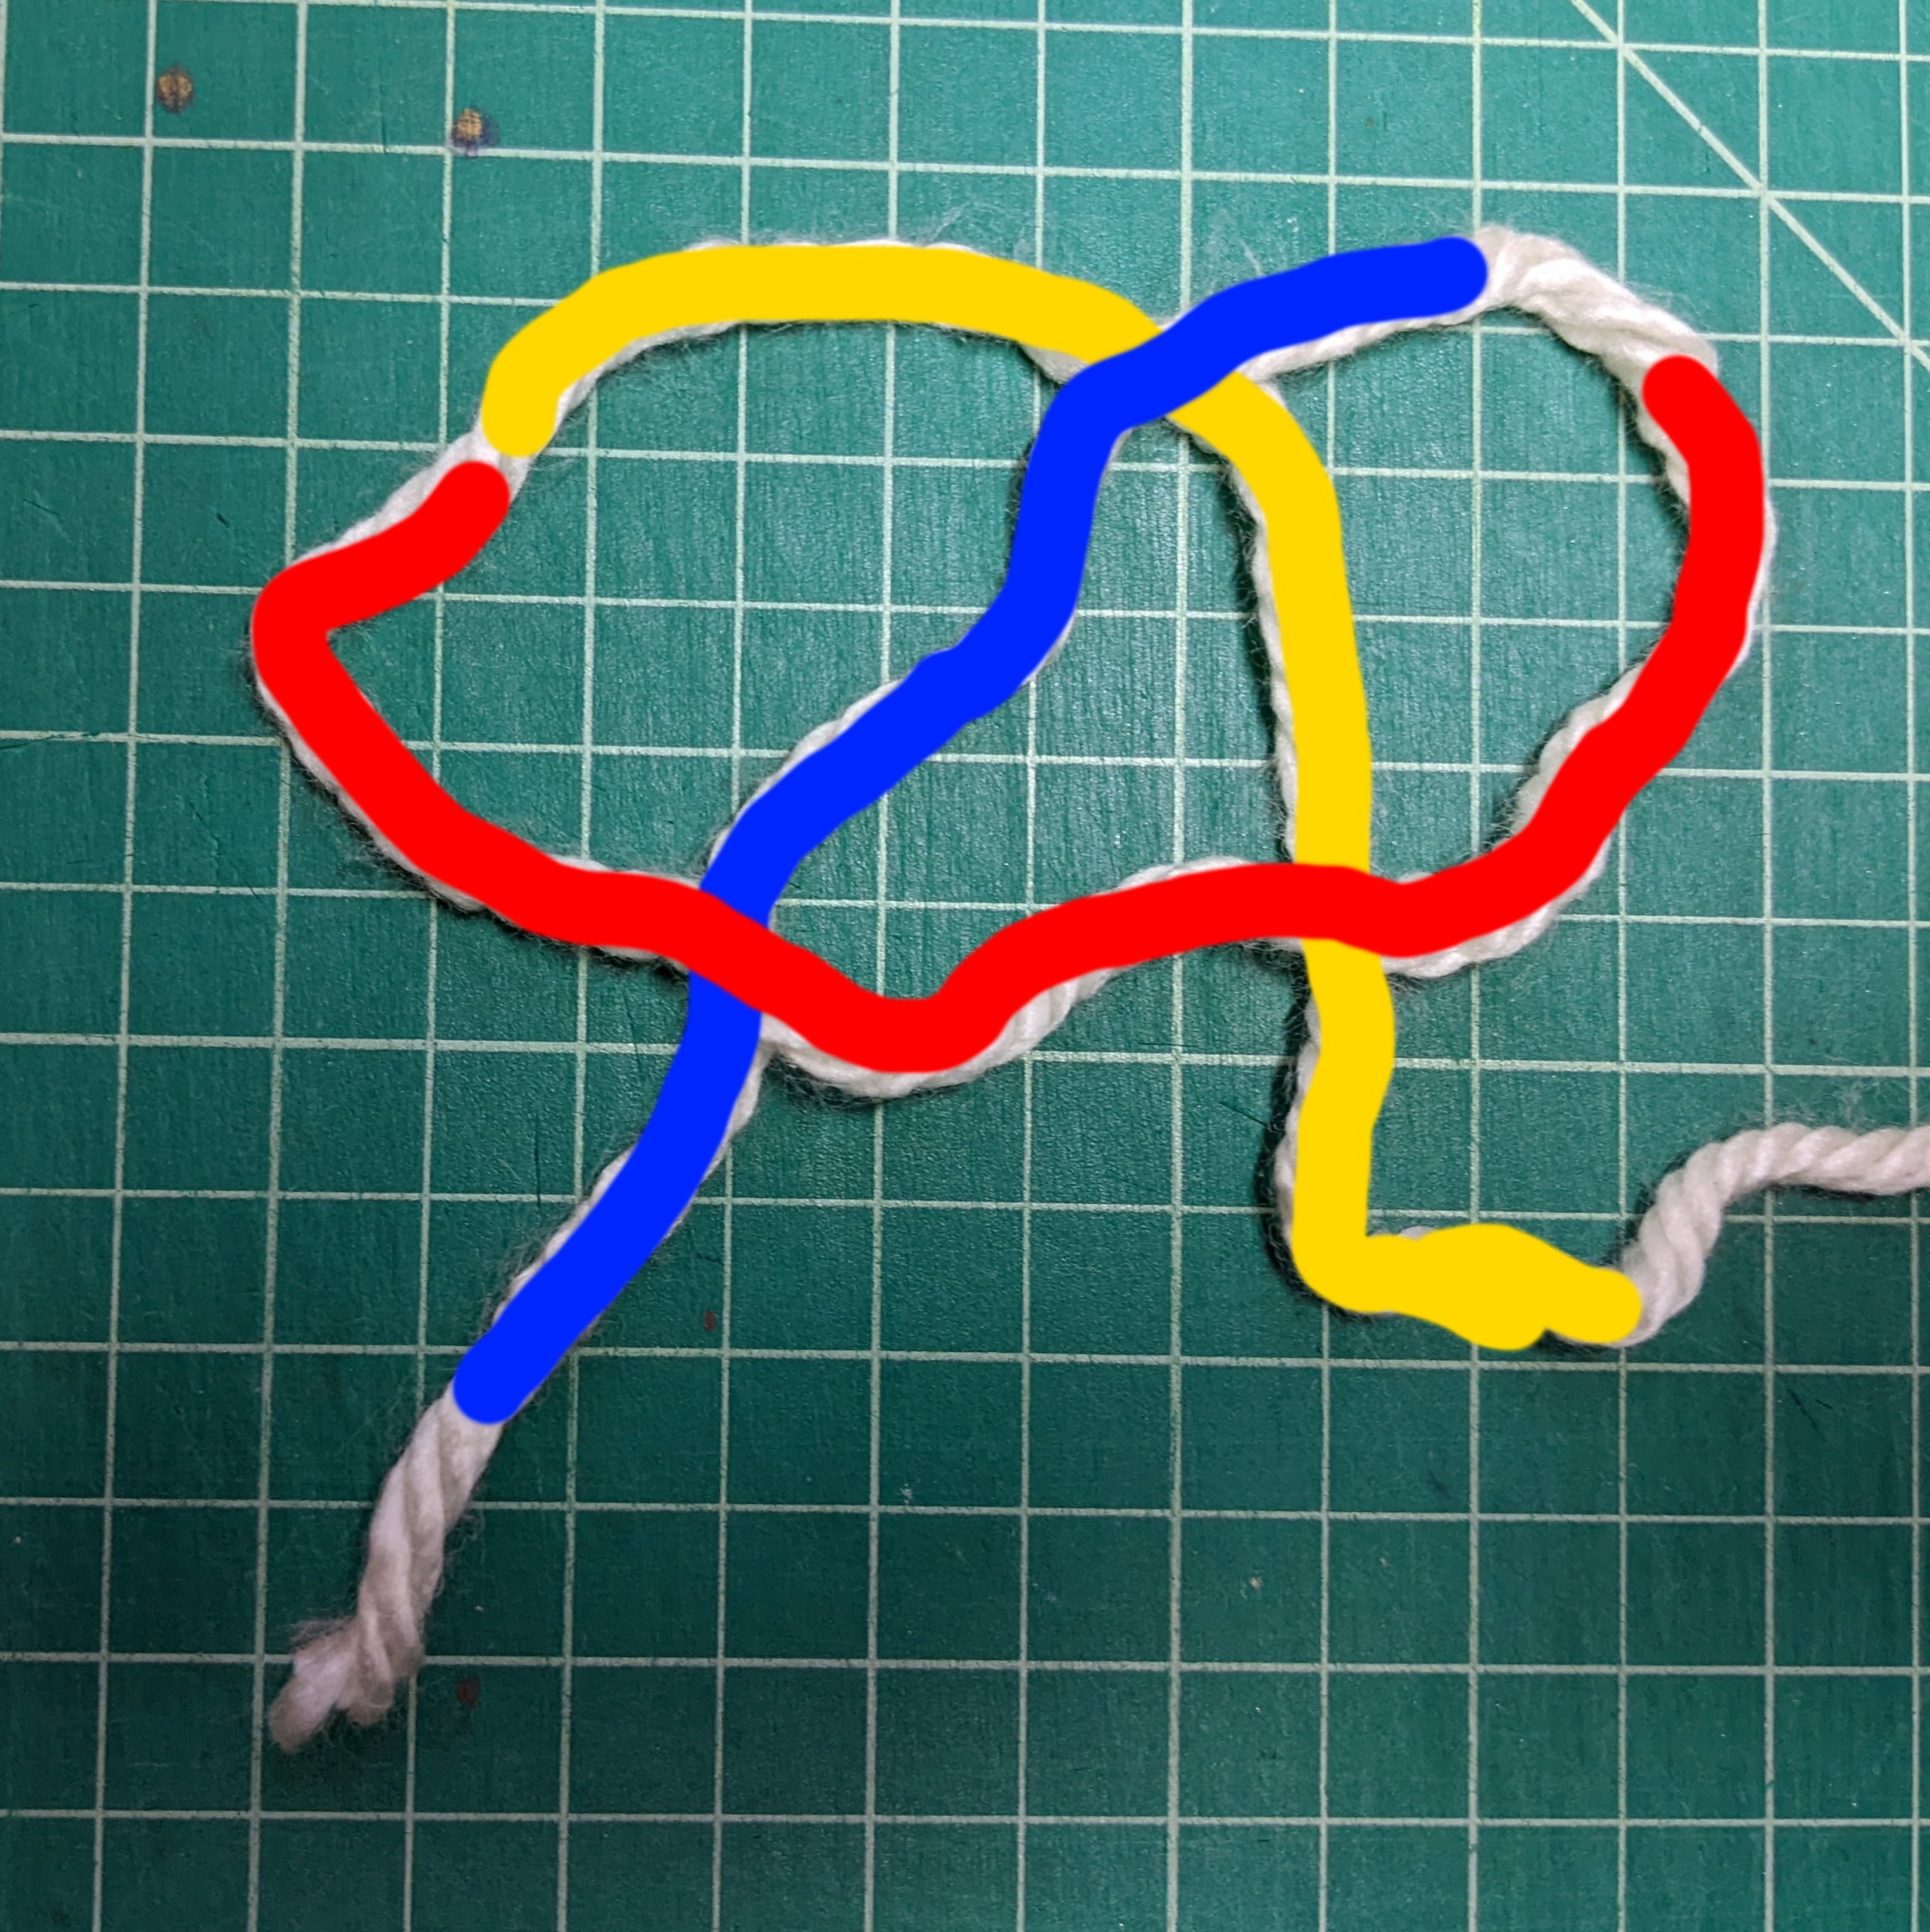
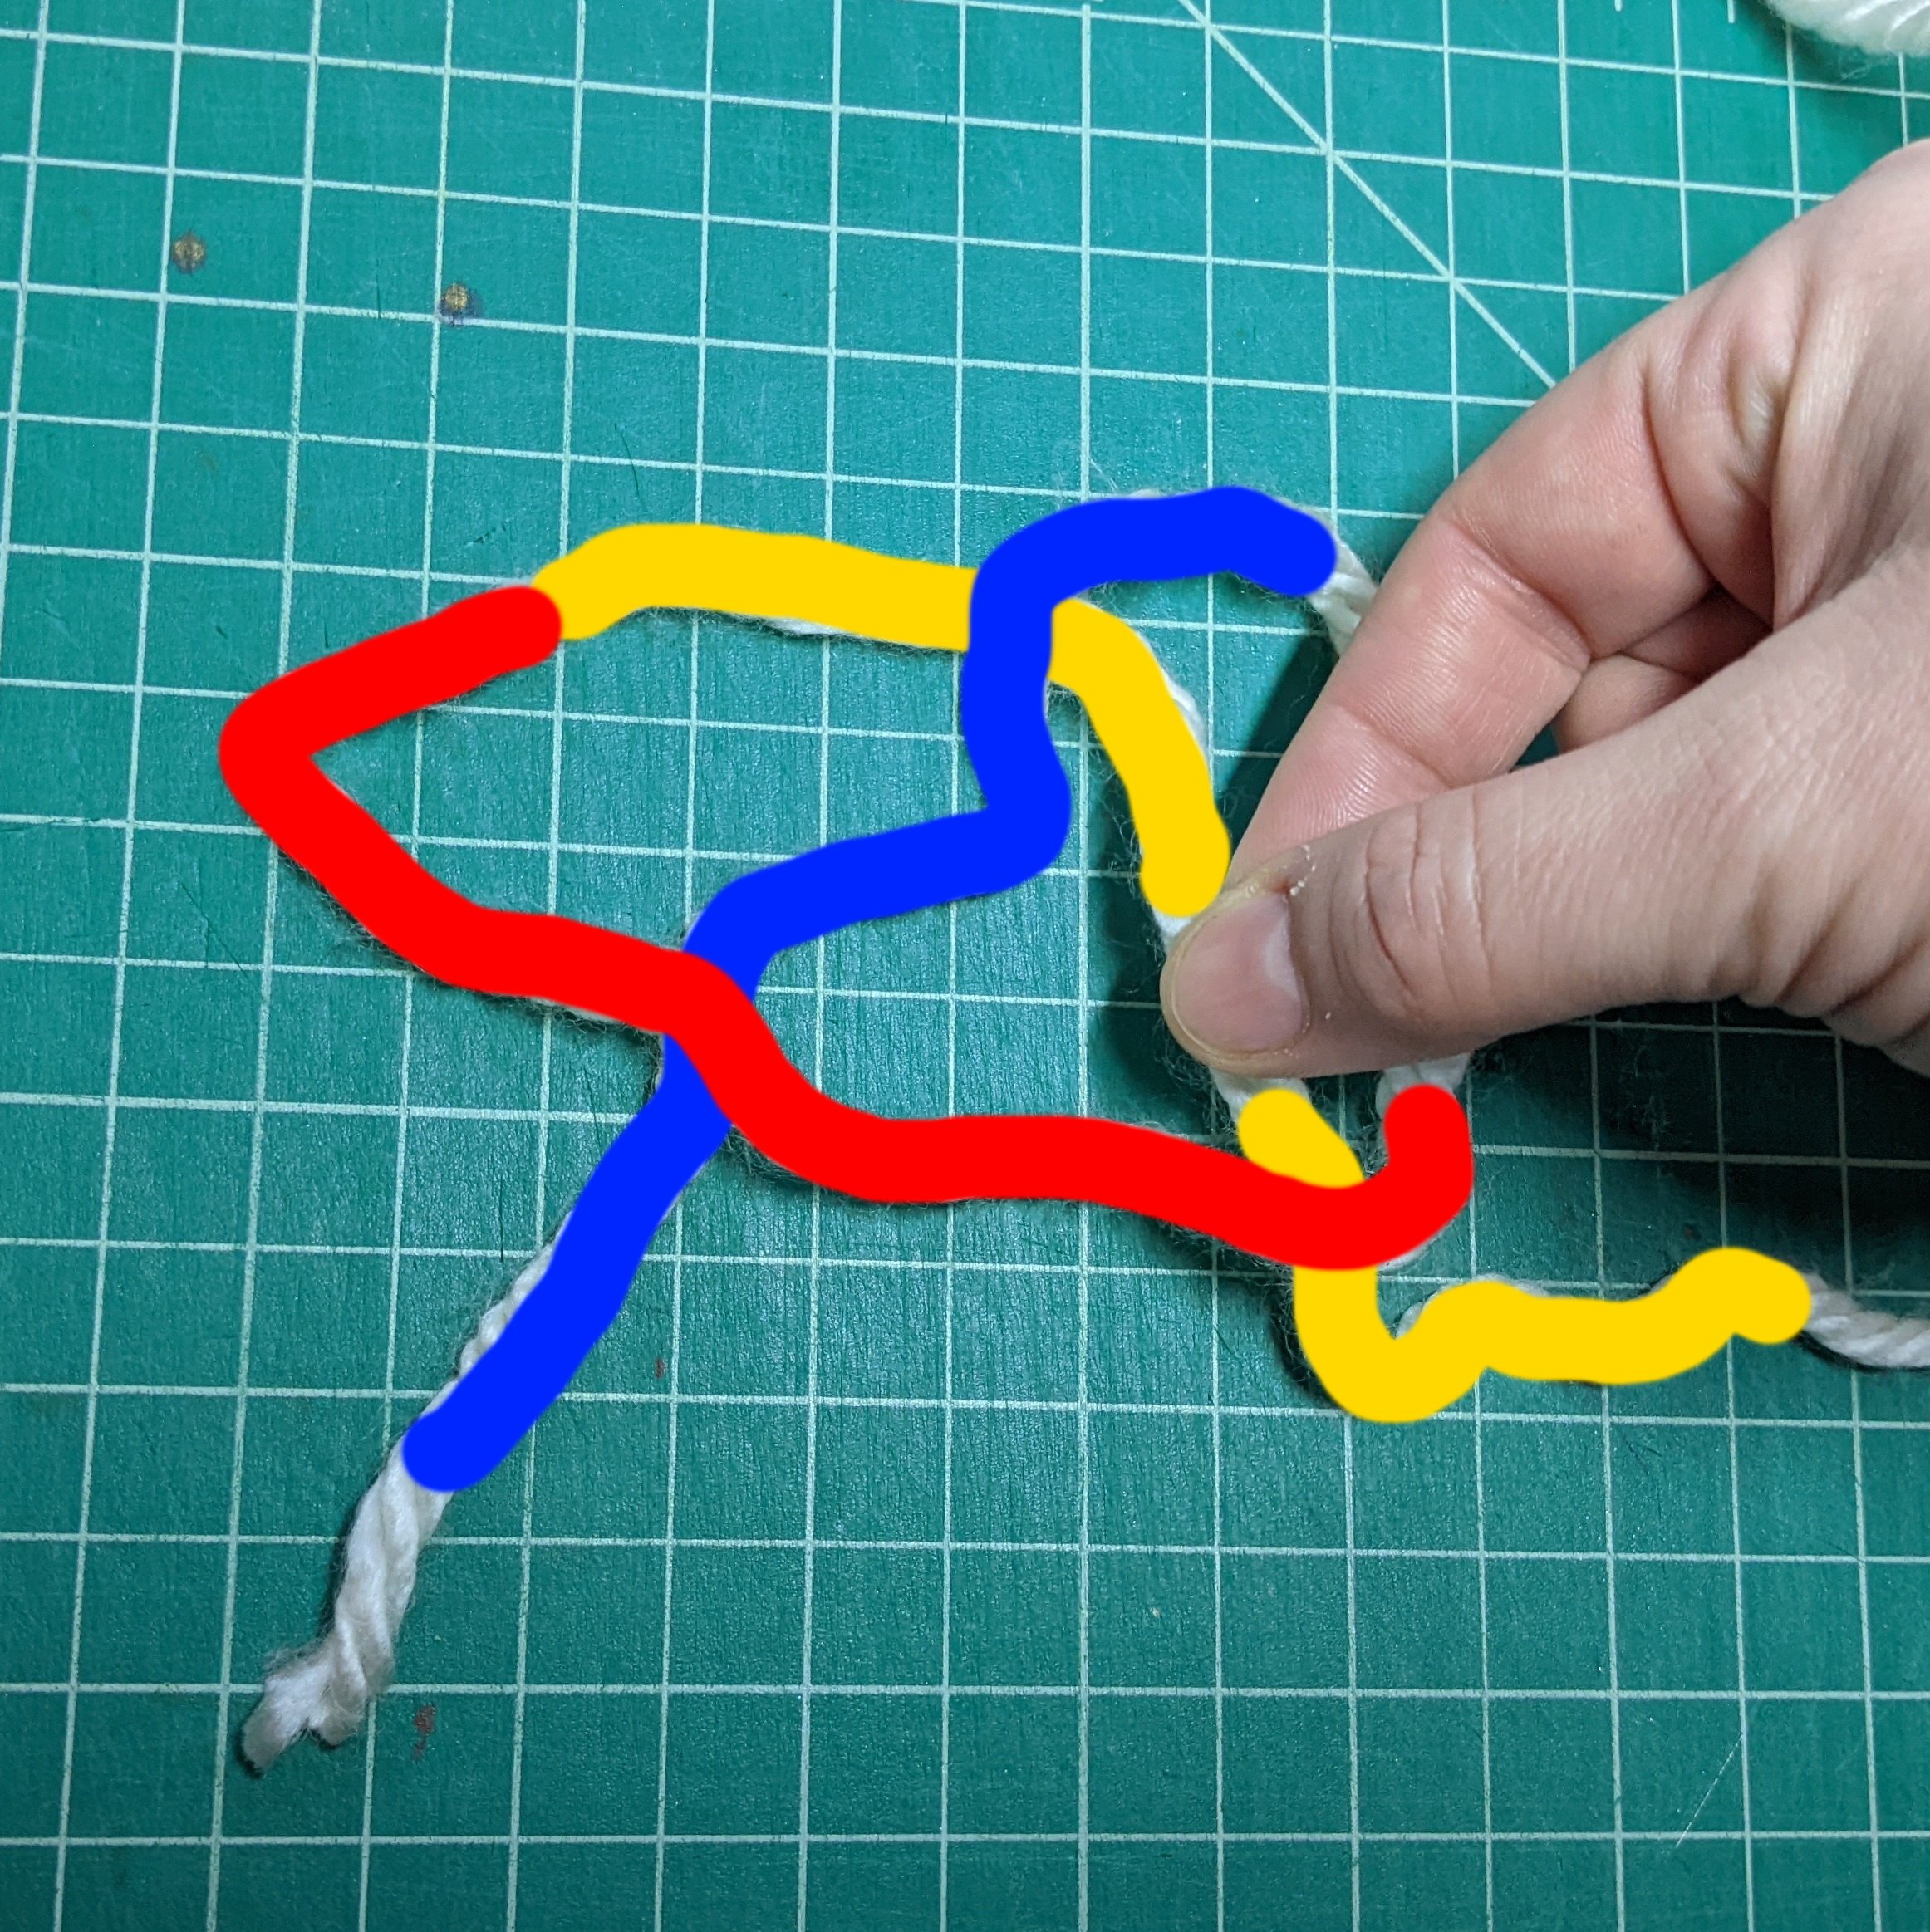
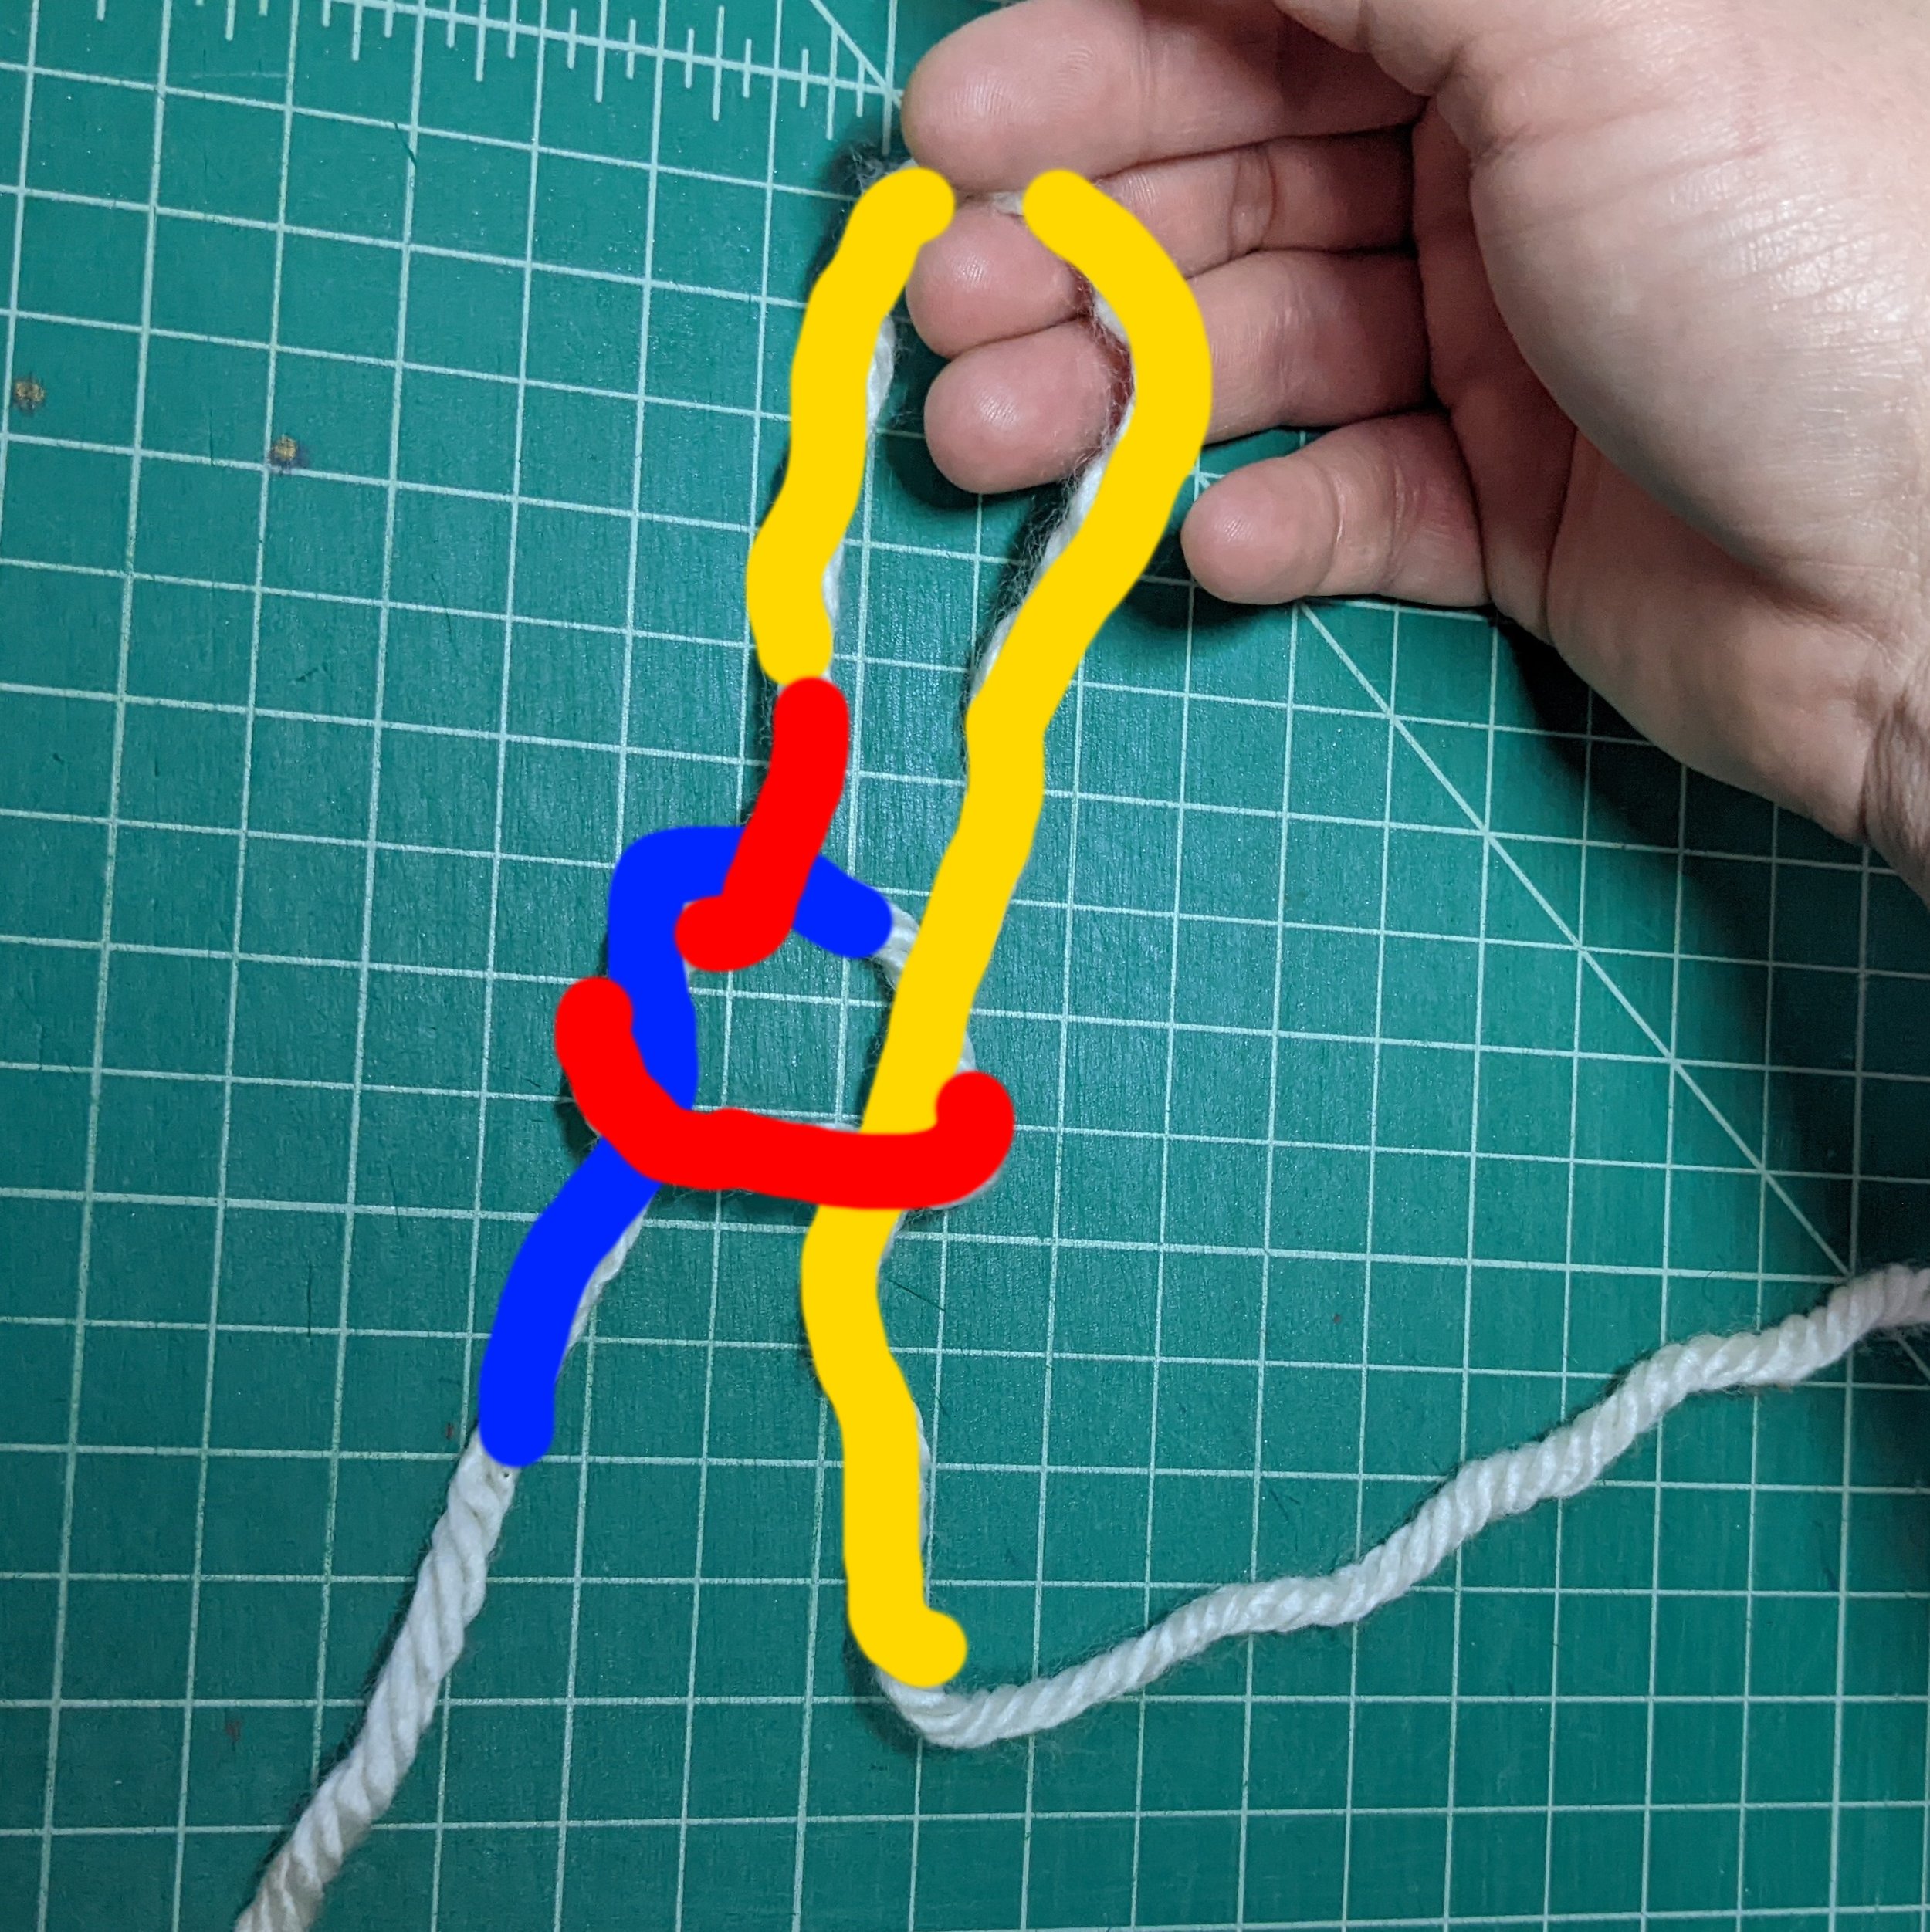


There are many ways to make a slip knot, but here is the way I learned.
Shawl pattern is Shaelyn by Leila Raven